Making Plans – The Road Ahead

I’ve decided to upload a full copy of the plans for the Little Rental House, for those who might be interested in seeing more details.  When I was first designing, I found that most house plans out there were behind a paywall.  Since I drew these plans myself, there isn’t any reason I can’t share them with the world, but if you find them useful I’d be happy if you wanted to make a donation that you feel reflects the value you’ve gotten from them.

I’m including some notes below, and as I have time to write up more aspects of the project, I will try to update this page with links to more detailed posts.
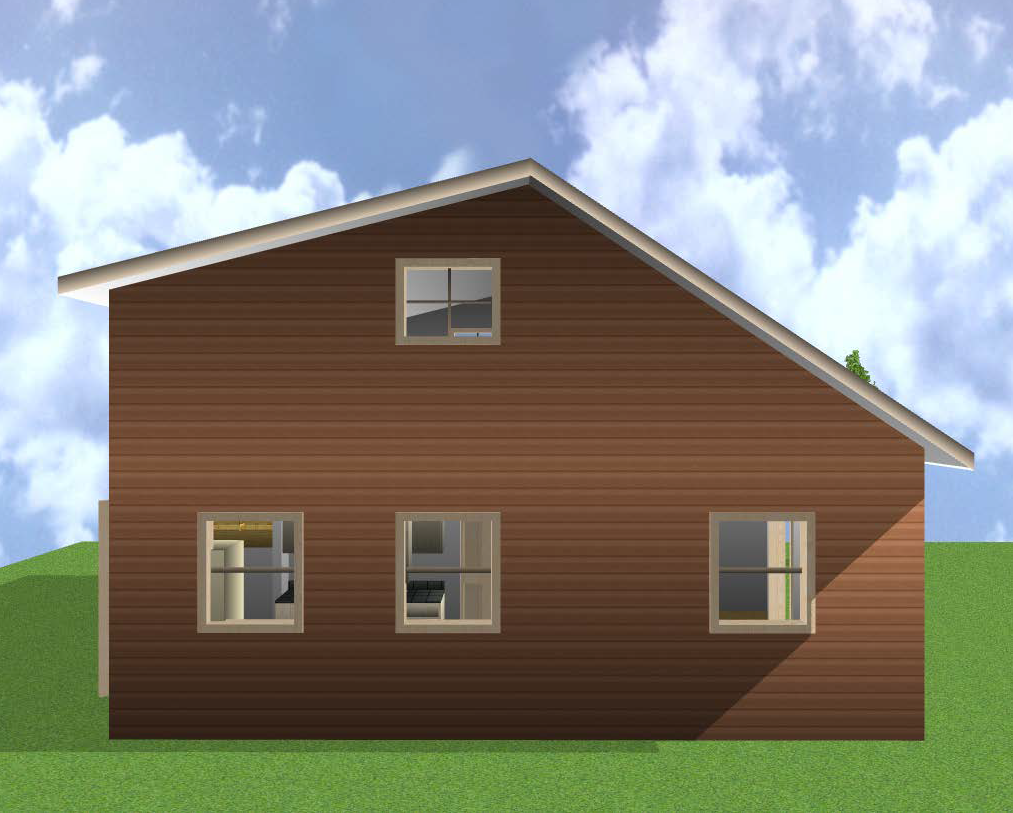
E – 1: Elevations

The original design work was done in an extremely old 3D Home Architect (version 10) from Punch Software.  While it has plenty of limitations and occasional crashes, the mere fact that it still loads and runs under Windows 10 is so gratifying that I’m willing to put up with a few glitches.  This allowed me to trivially create the 3D renderings shown on the first page.  They’re pretty, but they don’t necessarily communicate the technical details needed for construction.
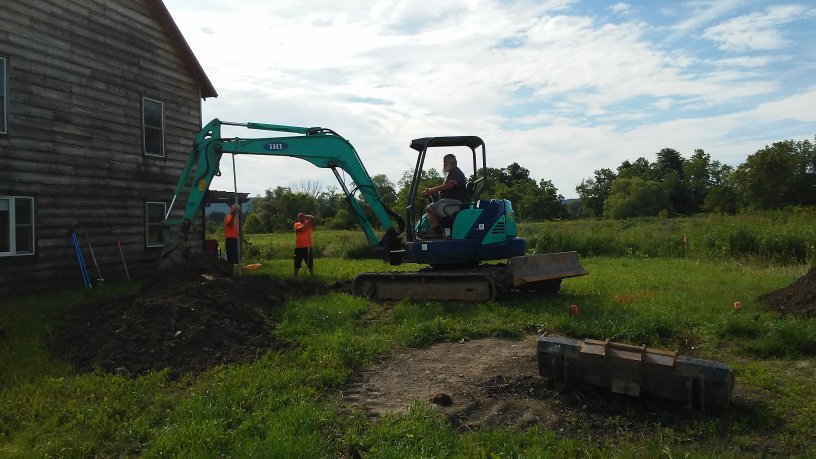
F – 0: Basement

I’ve written about the choice to include a basement in this blog.  The elevator speech I give people when they look at the big hole in the ground and say “oh, it’s going to have a basement?” is: Well, yes, but it’s really just for mechanicals.  It turns out it’s about the same cost to build a basement where I can do the other work myself, as it is to build a slab and hire people to do all the work that has to get done perfectly the first time before concrete is poured.  Plus, it allows me to add some features like waste water energy recovery that I wouldn’t have room for otherwise.

On the technical side, I’ve elected to go with cast-in-place walls for cost, making them 8″ thick so there is plenty of “bearing space” for the I-beams that constitute my floor supports.  These will run underneath the SIP flooring to provide a relatively low cost and low labor support structure that will prevent floor sagging.  I may at some point share some of the details of the engineering calculations for the beam strength here, but the short form is that spanning 24′ with wood would require huge timbers or manufactured wood beams that are much more expensive and not much more renewable than iron, and splitting the distance with a single 27′ beam and 12′ joists would have more susceptibility to the kind of “droop” that I’m experiencing in my own home, where doors need to periodically be adjusted so they latch properly.  It seems like steel beams are rarely used in residential construction, but I’m not entirely sure why not.

I explored the use of precast stairs, but found out that the maximum opening they would allow is 39″ wide, which would significantly limit the size of tanks and other items I might want to move into the basement.  It would also potentially need to be longer than the 6’4″ shown on the plans, which would make the stairs at risk of coming too close to the lot line.  Bilco’s standard “Size C” door will allow for a full 4′ wide staircase, which I’ll then have to build.

F – 1: First Floor

Because I’m building an accessible home, all the living areas are on the first floor.  Two bedrooms of 100 sq feet take up the east; an accessible bathroom is centered on the north wall; a large living/dining room area is at the southwest, and a small galley kitchen begins just after the front entrance at the northwest.

The layout optimizes the appliances that need water and drains (kitchen sink, bathtub, bath basin, toilet, and clothes washer) within a very small area, which will reduce the heat losses for hot water and the overall plumbing materials cost.  The stove is at the outside edge to allow it to be directly plumbed with an external propane tank.1

F – 2: Second Floor

This floor represents an L-shaped area of extra floor space.  It won’t be accessed by stairs, but rather by a ladder of some sort.  Some might choose to use it for storage, others as a play area for kids (it will have a railing around it), and others as an office.  Because it’s not accessible like the first floor, I didn’t want it to have any necessary functions, but getting a good roof slope for solar more or less automatically produces a space here and I thought many would find it useful.  There’s a small area at the southeast that is so low (below head height even for kids) that it’s not useful floor space, but some mechanicals (such as a heat-recovery ventilator) could conveniently be installed here.

M – 1: Electrical

This sheet shows the placement of various electrical fixtures on the first floor.  It includes the placement of various low voltage LED lights, low voltage (24VDC) electrical outlets, and the conventional 120V outlets and switches as required by code.  What it does not specifically cover is how the outlets and switches are wired to two different service panel – a primary 150A service panel and an auxiliary smaller (probably 60A) subpanel for “critical loads” which can be supplied from a solar battery bank inverter.  I’ll write about these details in a separate blog post.

S – 1: Sections

These fun little details show cross-sections of three portions of the design: the roof, the basement wall and first floor, and the slab/footer.  The roof details show how the different layers of insulation (which together add up to approximately R-53) are installed, which prevents condensation within the cellulose insulation.  The basement wall details show the relationship between the footer, footer drain, basement slab, wall, backfill, I-beams, SIP flooring, and SIP walls.  These details help identify how the structural components work together and also identify particular elements which need to be purchased and installed such as the “mud sill” and “rim joist” boards.  Finally the slab/footer NEC detail reflects the (relatively new) requirement that portions of the foundation which are in electrical contact with the ground must now have their own ground connections, in addition to the normal requirements for grounding rods.

W – 1: Schedules

This shows the window and door “schedules” that list the particulars of the windows and doors to be installed in each location.  Although I’ve listed preferred manufacturers here, this piece of the design isn’t 100% set in stone as the availability of different windows from different companies seems to vary a lot over time.  One of the key elements is the fact that the bedrooms must have “egressible” windows with a significant clear area (5.7 ft²) through which residents can evacuate and/or firefighters can enter.  In addition to the mandatory egressible window in each bedroom, I’ve also included one “E1” window in each bedroom, which meets the requirements only on the first floor (clear area 5.0 ft²).

N – 1: Notes

This page covers a lot of technical details which are better stated in text than in drawings, ranging from the general “do the work according to code” to details like the structural lumber stress values and the requirements for smoke and carbon monoxide detectors.

  1. I’m not thrilled with the use of propane, but it provides a backup in case electric energy winds up being in short supply.  At present, propane is produced in surplus as a side effect of oil drilling, and when there isn’t a market for it, it is often flared off.  So by using it I’m choosing to put that heat somewhere useful instead of making it a waste disposal process.

Ground Breaking News

I am now the proud owner of a big hole in the ground and several huge piles of dirt.

Additionally, at the far corner, you can see a couple of white drain pipes that will carry water away from the foundation (footer drains) and from overflow from rainwater collection, and dump them above the level of the nearby retention pond.  In contractor speak, these are referred to as “daylight drains” because they can see daylight at the downstream end; they don’t need a sump pump because they drain above ground just by gravity.

Excavation began at about 9am on Monday, when it looked like this:

Using the survey stakes set earlier, Enslow Landscaping1 dug about 7′ into the ground with about 3′ of extra space on the outside of each wall as working space for the foundation contractors.  The picture at the top was shot at just before 4pm.  Not bad for a day’s work, right?

Shortly afterward, it rained, and then I had several inches of water in the bottom of the hole.  My cat Zephyr decided to check it out.  (Curiosity and all that… I don’t think he’d die if he’d fallen in, but he would have gotten very wet.)

Then somewhere around 11pm on Tuesday night, as I was trying to go to sleep, I noticed something on reflection that I should have seen while it was right in front of me.  There was no excavation done for the stairs that go down to the basement!  I sent them a text, and they came back today (Friday) to address this and also to adjust the drains to get rid of the standing water.  Within a few hours (between 9:30am and 1pm) they had both issues fixed.

  1. I’d give the Enslow team a link, but like so many small construction businesses, they barely even do email much less have a web presence!

Staking My Claim

The phrase “staking a claim” started out as a literal description of an activity: marking a piece of land with stakes.  Today, the figurative returned back to its literal roots.  This post is now at the northeast corner of my building lot.

The surveyors went further and put in marks for the corners of the house – actually, offset by 5 feet from each corner to allow room for excavation.  These days, surveying is mostly done with differential GPS (DGPS) which has such remarkable precision that the surveying team was able to determine which of several marks on a nearby manhole (within an inch of each other) was their previous measurement reference.  Taking advantage of this, they put in large (2″x2″) stakes for the house corner offsets, and then repositioned the point of the GPS on top of the stake so they could mark a specific point within that 2″ square and put in a nail at the point.

This then allowed me to run strings (which unfortunately are barely visible in the photo) to mark the actual location of the house.

Today I also received a new excavation quote which is $5,600 lower than the previous one and includes all the materials, which is a huge improvement.

Just as exciting, my friend an neighbor Steve took delivery today of his new tractor, with which he’ll be starting a farm on the east end of our community’s land.

There’s other exciting news on the horizon, but for today I want to get this posted.  Pun, as usual, intended.

Deep Thoughts

No, not a Jack Handey reference, although I did find those amusing at one time.

I’m here to talk about my basement.  Why on (or more accurately, under) earth would I put thousands of extra dollars into a basement which doesn’t even provide living space?  It turns out that there are a host of reasons, many of which are quantifiable in dollar terms.

  1. Rainwater storage: $5,000 saved without direct burial.
    There are conventional water storage tanks which are designed to rest on a floor, and there are direct-burial “cisterns”. Even though both can be found in the price range of $0.70 to $1.20 per gallon, the cisterns tend to be on the higher end of the price range.  For 1500 gallons of water storage, a difference of $0.50/gallon is $750.  However, this is the least of the concerns.  A direct-burial cistern needs tank heaters if the frost line is below the level of the tank (and of course, it is here1).  These would obviously consume precious energy.  Then, there’s the excavation cost (assume a tank height of 48″, buried at maximum depth of 36″, in a 15’x10′ hole, excavated 8′ deep and then partially backfilled with compacted sand) which could add another $3,000.  Plus the materials for backfilling, perhaps another $1,200.
  2. Doing plumbing labor myself: $4,000 saved with basement.
    When one is doing plumbing work in a slab, one is literally setting into concrete the pipes and drains.  Any mistake (due to inexperience, or a design change) becomes extremely difficult to rectify after the fact.  I think it is fair to assume that being able to do the plumbing entirely myself will save $4,000.  (Typical plumbing costs for the reference homes were $8,500 to $9,200.)2
  3. Reduced heating costs relative to slab-on-grade: $150 per year
    By using the super-insulated SIP flooring over a relatively constant basement temperature, we’re able to save significant energy costs for heating and also require a smaller heating system. 3
  4. Solar storage battery lifetime extension: $600 per 10 years.
    Lead-acid batteries have a significantly extended lifetime and better retention of stored energy (albeit at a somewhat reduced capacity) if they are kept at lower temperatures.  Assuming a $2,000 battery array with a basic lifetime of 10 years, the loss in capacity might require a 10% increase in size, but the lifetime might be extended to 16 years.  Obviously the larger the battery array, the greater the impact, and this is an ongoing reduction in maintenance costs rather than a significant difference in initial cost.  The lifetime of electronics such as inverters and chargers is generally better at lower temperatures as well.
  5. Space for drain water heat recovery: $100 per year
    With a ground floor bathroom, it would be difficult to install a drain water heat recovery system.  This system can provide significant savings in the energy required to supply the home with hot water.
  6. Space for solar batteries and inverters.
    Although this doesn’t have a calculable direct cost impact, the fact that these large items don’t take up space in the home means that the living space doesn’t need to be increased to compensate.
  7. Space for greywater recycling.
    Again, this has no easily measurable cost impact.  However, because the toilet by itself uses over a quarter of the water in a typical US household, reuse of greywater from other sources for toilet flushing can dramatically extend the capacity of rainwater storage, allowing for a smaller system or better performance of the same-sized system (fewer “dry spells” that must be sourced from groundwater supplies).
  8. Space for rainwater first-flush system.
    Probably the greatest source of contaminants in rainwater comes from dust that collects on the roof between rain storms.  A “first-flush” system which discards the first 0.1″ of rain during each storm allows these contaminants to be washed away, providing much better water purity at the input.  Meanwhile, the flushed water can be routed directly to the greywater storage.  Such a system could be installed outdoors, but then it would be susceptible to freezing and potentially need to be disconnected during the winter time.  By implementing it inside the basement, it can be easily interconnected, easily maintained, and protected from freezing all at once.

So on the assumption that I have the house for 10 years, the basement is saving me on the order of $12,000.  Although I don’t have a direct way of comparing, this is comparable to the cost of the basement, and it also provides a number of non-monetary benefits listed above.

So, we go deep.

  1. Frost depth for a normal winter in the northeast is usually no more than 4 feet, so traditionally pipes are buried at 4 or 4 1/2 feet (5 ft for the main).  With only one day in February above freezing so far, the frost line has gone well below normal.
  2. Electrical work might be similar, except that in general very little of it needs to be done in the slab.
  3. Detailed calculation: Slab-on-grade, 102′ perimeter, 0.5 BTU/(hr-ft-°F), 24 hours/day,  6803 degree-days, adjusted to 8628 70°F-degree-days, gives about 10.6e6 BTU/yr.  SIP floor, 648 sqft, (70-50)=20°F temperature difference for comparability, R-41 SIPs, gives 361 BTU/hr or 2.8e6 BTU/yr.  Assuming a heat pump at $0.14/kWh, this difference is about $156/year.

Budgeting for Construction

Below is the budget that I have developed for the construction of the Little Rental House.  The lot was already paid for a long time ago (to help the community get the funds it needed for legal and infrastructure work) so that aspect is already known with accuracy.

When formulating the budget for the Little Rental House (#3, 992sqft, 2br 1ba), I used a combination of numbers from three homes previously built here at White Hawk: my own home (#6, 1536sqft, 3br 1.5ba), the home next door (#5, 1408sqft, 3br 1.5ba), and my parents’ home (#2, 1800sqft, 4br 2ba).  Because #2 was built in 2014-2015, while #5 and #6 were built in 2007-2008, the former gives prices much closer to “current day” while the latter need to be significantly adjusted for inflation.  However, #2 is a 4-bedroom home built with double-stud walls, so many of the architectural elements are very different.  #6 is the only reference with a basement, but was built with a lot of extras such as oak trim and flooring, so those costs aren’t representative of what I’m building.  And #5 is a good reflection of the trim level, but is larger and built a decade ago.

In all cases, I have the budgets (actual cost for #5 and #6, builder-estimated for #2) broken down into great detail, rather than just a lump sum total cost.  Thus, I was able to pick and choose, taking for example basement costs from #6, flooring costs from #5, and roofing costs from #2, with appropriate adjustments for number of rooms, square footage, etc.  Contractors often estimate construction costs on the basis of cost per square foot, and on that basis we find a range of $105/sqft for #5 to $124/sqft for #2 to $142/sqft for #6.

My basic budget (without the “extras”) has the Little Rental House just below the high end of the range at $136/sqft, even with almost no labor costs.  With the extras, it pops up to $147/sqft, higher than all of the reference houses.  There are several reasons for this.  First, the actual living square footage of the house is the smallest, so even though it is the lowest total construction cost, this increases the cost per area.1 Second, the basement is adding a substantial cost (about 6%) to the total.  Third, the additional cost of more heavily insulated walls adds another 6%.  However, it’s also unclear whether it’s fair to compare 2008 prices to 2019 prices; perhaps the homes built back then would be substantially higher today. 2

The budget below 3 represents the baseline that I’m working toward, will provide the structure for reporting the actual costs as we go along, and also provides the initial basis for estimated return on capital.

Budget ItemEst CostBasis for Estimate
Lot lease fee$40,000Contractual
Site preparation and excavation$8,000Assume same as home constructed on adjacent lot
Utilities-Oversight - was not budgeted
Foundation$10,330Assume: $4,000 for slab, $4,000 for ICF, 24.3cu yd concrete at $100/yd
I-beams$2,084Estimated based on weight of steel at $1/lb
Structural Insulated Panels (SIPs)$14,118$7.25/sq ft budgetary estimate, 1830 sq ft, $850 delivery
Framing material$3,000Detailed estimate from spreadsheet, rounded up
Framing labor$0Building it myself
Roof material$2,178Rafter framed, plus sheathing and steel roofing
Roof labor$1,600Assume same as home constructed on adjacent lot
Siding$1,800$1.5/sq ft
Siding labor$0Install myself
Windows and exterior doors$5,077Detailed estimate from spreadsheet
Electrical$2,250$25x40 outlets, $50x25 light fixtures
Plumbing$2,000Assuming I hire someone for septic but not for DW/DHW
Plumbing fixtures$1,700Use numbers from adjacent home but refactor for single bathroom
Heating$1,400Daikin RXS12LVJU
Wall finishes$7,000Use 60% of number from adjacent house based on smaller area
Interior doors$1,3004 interior doors
2 closet doors
Floors$5,952$6/sq ft
Kitchen$1,850Detailed estimate from spreadsheet for cabinetry, plus kitchen sink cost
Appliances$5,300Unique UGP-24CT1
Unique UGP-470L1
Combo washer-dryer
Microwave
Insulation$2,5004" R-6.5 foam over 7.25" R-3.6 cellulose in cathedral ceiling
Deck/porch$0Not including in initial build budget
Contingency$15,88820% of sum of above (except lease fee)
Extras - solar$6,718Battery backup
LED lighting
Extras - water$4,000In-basement rainwater collection and treatment
Total$146,045(including extras)


  1.  Some items, including the lot, have a fixed cost, so the smaller the home, the higher their impact.  Others, including site prep, plumbing, electrical, and roofing, have a significant base cost even if they do scale with home size.  Another important consideration is the fact that the home is mostly on a single story.  While this helps with accessibility, it means that there is, for example, more roof per square foot of house than there would be for a two-story home.
  2. One source suggests that this could have increased by as much as 50%, so that even the cheapest $105/sqft would really be $157/sqft, but I think that exceeds the construction cost people are seeing for other homes here, ones for which I don’t have detailed budgets.
  3. I apologize for the somewhat awkward formatting – I was torn between using TablePress (which gives you content in a searchable text form but doesn’t let me control the layout at all); or alternately inserting an image (which would let me make the format more legible, but wouldn’t contain text that you could access).

Foundational Beliefs

As I so often seem to do, I’m leading off with a pun.  I want to write about the principles that are guiding the Little Rental House project, and the principles that I’m hoping to apply in writing about it.  At the same time, I’m in the process of getting quotations for the foundation, so I intend to update you on that as well.

Principles

Transparency

My wife Raederle has observed that as we have become more open about sexuality, money has remained one of our greatest taboos.  In writing about this house construction project, I’d like to work on breaking down that barrier and start talking about some of the relevant financial issues, including:

To this end, I intend to post my a priori budget, along with an explanation of what it is based on, so that we can look at a before-and-after comparison and talk about where the estimates were out of line, and why.

I will also be posting about the economics of rental homes and how this is part of a transitional strategy toward retirement.

Passive-Level Energy Use

The community that I live in refers to itself as an “eco-village,” and accordingly all of the homes here have been built to extremely high standards in terms of both lifetime energy efficiency and the use of local materials and non-toxic materials to the greatest extent practical.

I want to go a step beyond this and build a house that as closely approaches a passive level of energy use as possible – a “passive house“.  This means among other things that sufficient heat is captured and retained from normal daily activities (body heat, plus cooking, electronics, etc.) that active heating is never required, even during the coldest part of the year.  I will talk in detail about the choices that support this and why I think it matters.

Grid Flexibility

Related to, but separate from the passive house considerations is the idea of a house that can operate flexibly either on or off the grid.  Every existing home in our community has at least some “grid” requirement, either in the form of electric (grid-tied solar) or natural gas, or both.  Furthermore, the existing homes all rely on a community water supply that comes from a local aquifer before treatment.

With this house, I will be building in grid flexibility.  Essentially all day-to-day activities will be possible using only the solar panels provided on the house.  While some activities (such as drawing a 50 gallon bath of pure hot water) may be limited when off grid, in most cases normal practical activities (such as a 10 minute shower) will be possible.  I’ll talk about what activities are supported and curtailed, and how the passive house choices play into this.

Progress

This week, I’m scheduled to have the surveyors out.  Although they charge quite a bit to “mobilize” (mainly for travelling here and getting all their equipment set up, I think), I’m coordinating this effort with several other interested parties so that we can get more measurements (a total of about 20 survey stakes) for an estimated $850.  This doesn’t actually have a line item, so I have to decide whether to count it as “site prep” or just take it out of the contingency budget.  It seems logical that putting the stakes in at the corners of the site and the house is a form of site prep, so we’ll go with that.

Separately, I’ve received price quotes on excavation and foundation.  The first excavation quote came in at $21,000 which puts it 162% over budget!  Part of this is the lack of a budget for utilities (my fault) but they attributed part of it to a junior employee making the estimate and not recognizing potential places to economize (such as, putting both water lines and basement drains into a shared trench).  I’m working with them to get a more definitive estimate, but I’m also looking to get a second quote – if I want to keep things on budget, I need to not just go with the first price I get, even if the contractor in question has been very affordable in the past.

My first foundation quote was based on the use of insulated concrete forms (ICFs).  However, as I was considering things, I realized that given that the basement is going to be purely mechanicals, there isn’t any good reason to insulate it.  So I also requested a quote based on formed and poured walls – slightly thicker (8″) walls to compensate for the lack of other structural elements.  (It turns out this saves money in another area, because the ICFs are required by code to be covered with a fire-resistant surface – drywall – even though it’s not living space.)  The quotes broke out the slab from the footers and walls, so the total is $14,200 for footers+ICFs or $10,300 for footers+formed and poured walls, another $3,000 for the slab, and then on the order of $700 for waterproofing.  Add in another $1,000 if a pump truck is needed for any of the three operations.  (I should be able to avoid this by making sure that a regular truck can back directly up to the site.)

I am strongly leaning toward the formed and poured solution for pure cost reasons; this would give a total of about $14,000 which is still 35% over my budget.  Part of this can be explained by the addition of a “bump out” to install basement stairs.  Although I could use pre-fabricated concrete stairs (quoted at $1,800 delivered and installed) I could not use the prefab solution and still have the stairs be the width I wanted (48″, to handle large water storage tanks) or come out the distance that I need (72″) to keep the house within the appropriate envelope of the lot.  So some of that cost overage is compensated by the fact that I’ll be putting in wooden stairs instead.  (None of the comparable designs I used for budgeting had exterior basement-access stairs, so this was an oversight.)

A New Start

This blog has languished for some time while a number of shifts have happened in my life.  While I’ve learned many things in this time, I haven’t been producing much intellectual output aside from my work.  I wanted to change that, and as this timing coincides with receiving a building permit for a new home that I’m about to build, it seemed a great chance to combine the two threads.

So, while this post is a new start for the blog, it also represents a new start in the sense that economists would call “building starts” – a permit has been issued for #3 White Hawk Ln. (affectionately known as the Little Rental House), and I’m hoping to begin construction soon.  I expect to be blogging about the design, the process, and various other aspects.

The new house will be essentially one story, with two bedrooms and one full bath.  There is some additional loft space above that can be used for storage, office, etc., but other than the house is intended to be ADA accessible by design.  Beyond that, it will also have the highest insulation levels of any home yet built at White Hawk, in an attempt to reach “passive house” levels of efficiency.  (I won’t write that out in German because I think it’s a trademark if I do.)  I have a wide range of other “neat features” planned but I won’t spoil all the fun by writing about them in this first post.  I plan to be doing a lot of the construction myself to keep costs in check.

Obviously, I don’t have any interesting pictures to share, but I’m including a rendering of the house as seen from the west (looking in the windows into the kitchen, at the left, and the living room, at the right).  I have also uploaded the full plan set (large, 2.3M PDF) for people who might be interested in those details.

The current status is thus: I have the building permit in hand.  I am waiting for the surveyors to come out and mark for both the lot position and the house position.  I’ve started seeking quotes from contractors for excavation and foundation work, which I don’t feel qualified to do myself.  I’ve been learning about the differences between pre-fabricated Bilco basement entry steps and building the staircase myself; and I’m looking into how this impacts the choice of equipment that I can potentially put into service in the basement.

And I’ve already (based on the first quote) gone something like $13,000 over budget.  So… I’ve got to work on getting that down.  My estimate was based on the fact that the total cost for site prep and excavation for my current home was $5,300 (in 2007).  I expected this to go up, and resources like this suggest that maybe 50% increase was reasonable, so my budget was $8,000.   You can imagine my surprise when I got a quote for $21,000.  Of course, the quote isn’t quite comparable, because it includes work that on my current home was recorded under “utilities,” and which I hadn’t properly estimated in my initial budget.

I’ll keep you posted on how things look as I move along.