Jul 2020: Up the Ladder to the Roof

When I was in college, The Nylons were very much in vogue.  I am sure it never occurred to me at the time that I might be climbing said ladder for the purpose of building said roof.

Cutting rafters is at lot of science and a small amount of art.  I learned the technique many years ago when I was drafted for the job during the construction of our community’s horse “run in” (think of it as half a barn).  It involves a lot of work making cuts known as “birdsmouths“; if you were to try to place a rafter without such a cut on top of the beam and top plate, what it would do is simply slide off (and hopefully not fall on anyone).  To avoid having the rafters naturally pulling away, they need to be resting on a horizontal surface.  The top of the beam and the wall plate are horizontal, and the birdsmouth cut—which looks like it’s at an angle when you’re staring at an uninstalled rafter—aligns with this horizontal surface when the rafter is installed.  This is where the old fashioned carpenter’s framing square really shines.  If you know the pitch of your roof—typically specified as a ratio in inches or feet, like my 3:12 shallow north side and 8:12 steep south side—you can simply find those number of inches on the two legs of the square and find it lined up exactly at the angle you want.

Making matters slightly more particular, the cuts can’t be more than a certain depth, but have to be a certain width, and various other parameters in order to meet code.  As mentioned last month, my oversized 2x12s really only needed to be 2x10s, and allow for a slightly deeper cut.
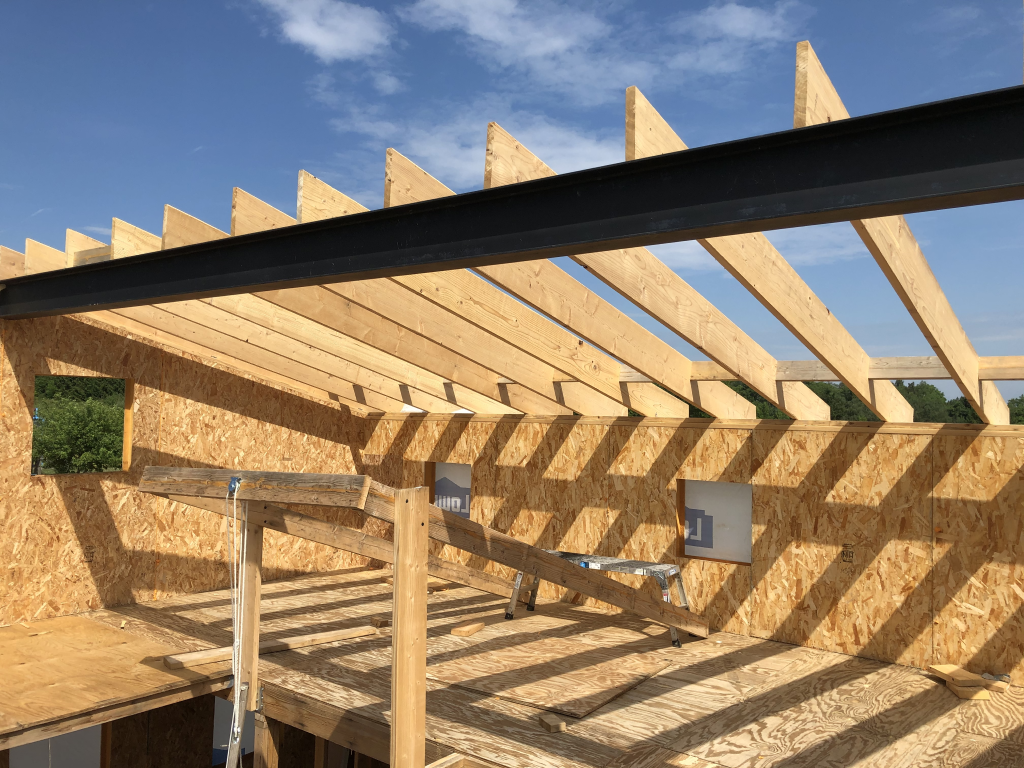
2020-07-03 North Side Rafters

The art comes in to figuring out which portions of the design you can simply repeat over and over for 13 rafters on each side, and which ones need to be carefully measured.  Art isn’t my strong suit.  I did a lot of measuring, averaging about 1h22m per rafter, for a total of almost 36 hours.  Pretty much every rafter went up once for measurement, down again for cutting, and back up again into place.  Also, until you get very familiar with it, you’ll probably find yourself turning the framing square around at least once and maybe twice for every single birdsmouth you try to mark.

Oh, and then there were those two outer rafters.  These turned out to be quite a chore, because the birdsmouths on the interior rafters caused them to fall slightly lower than the level where the cut SIP edge lay.  In the end I wound up having to do long rip cuts to adjust the rafters to match up with a level top surface.  Slightly more careful thought about the relation between the SIP cuts, inlet nailers, and beam position would have been helpful here.  Oh well, it worked.
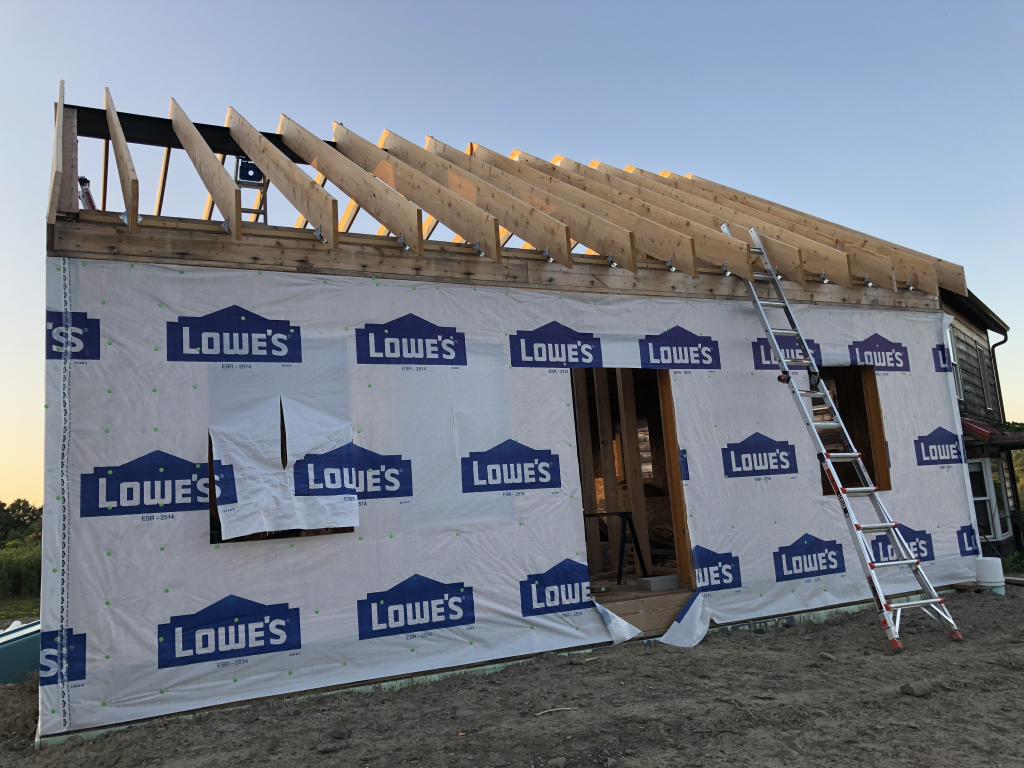
2020-07-17 South Side Rafters

After putting the rafters in place, I started on what would become another of the many facepalm manoeuvres: placing blocking SIPs between the rafters.  It seemed like a good idea—in fact, it probably was a good idea—but for the fact that I didn’t think about the need for a gap for the roof ventilation (more on that later).  I got about this far before I realized the problem:
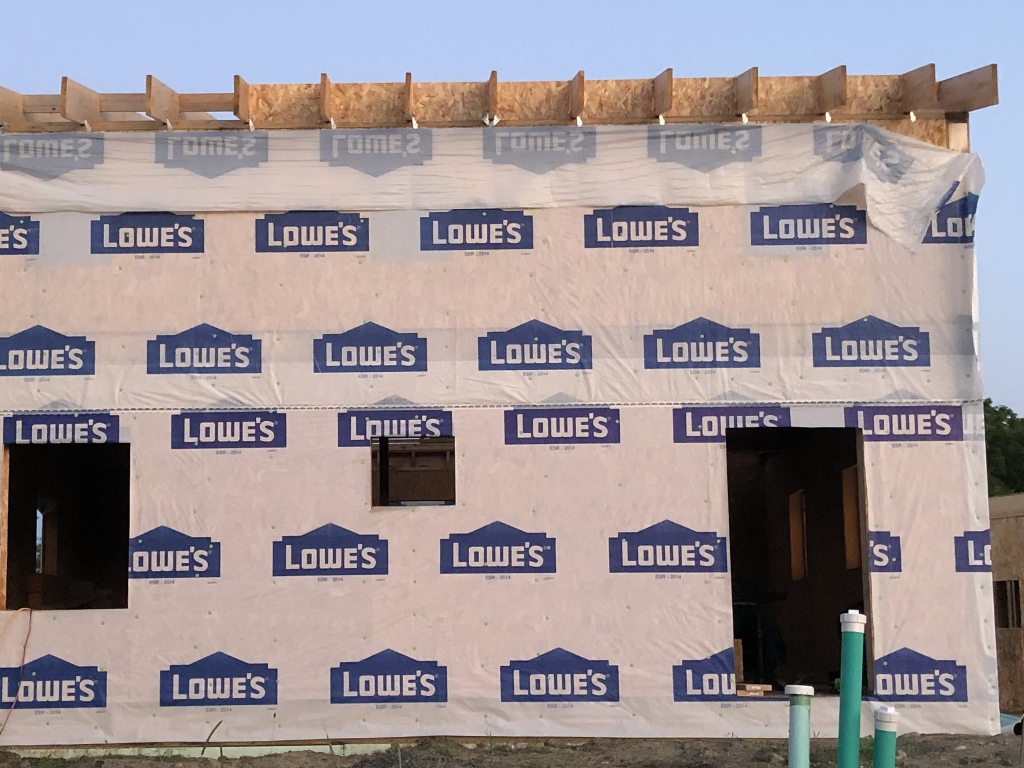
2020-07-24 Rafter Blocking SIPs

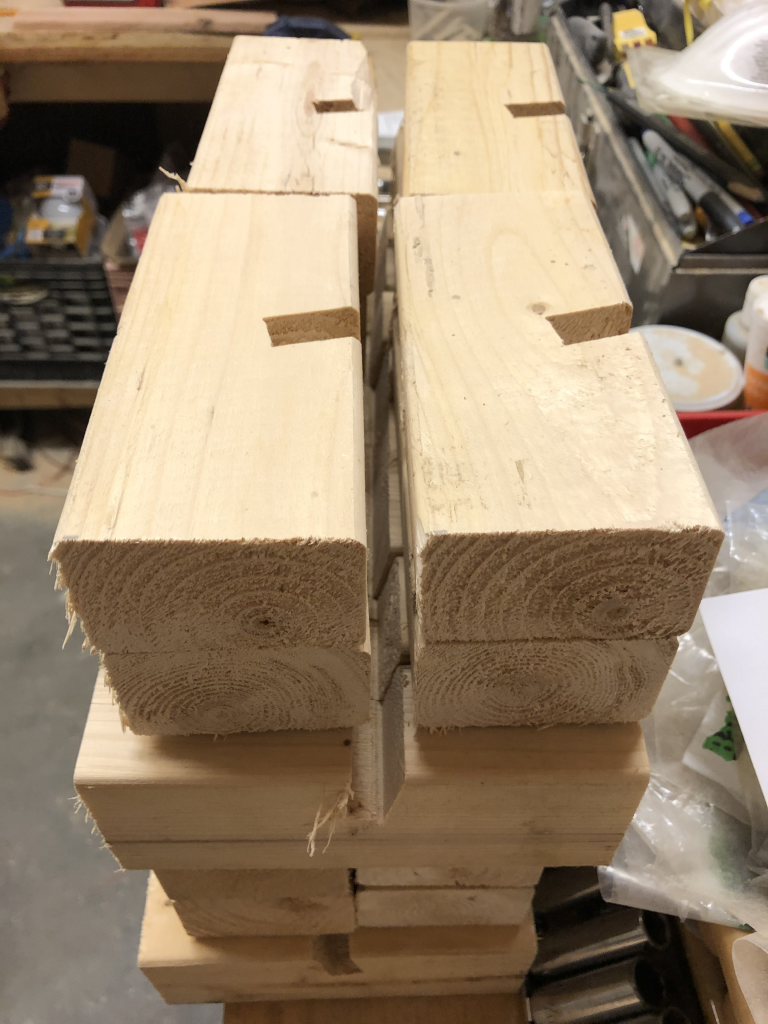
The second hand of facepalming was because that each one of those SIP blocks was a lot of work (about 22 hours).  Each one needed a carefully miter-cut 2×8 plus a lot of manually cutting foam out of the SIP; because of the angle, it wasn’t possible to use the SIP panel router.  That was a big part of the reason I decided to change strategy for the fix, rather than just cutting them down and trying again.  The replacement amounted to simply installing OSB panels, and then putting in foam board insulation with spray foam sealing after the fact.  However, the top end of these OSB panels had to be solidly anchored since they would be about 1-½” lower than the top of the rafters.  I settled on making a lot of small 2×3 blocks with angle cuts to slide around the OSB:

2020-07-28 OSB Angle Blocks

More than that.  A lot.  56 in total.

2020-08-01 Way More OSB Angle Blocks


How to make these efficiently is may actually be an interesting aside.  I cut the 2x3s down to a more manageable length (4′), and then set up a dado blade to make a cut of the right width to match the OSB (a little wider, so I wouldn’t have to deal with it binding).  But the dado blade had to be angled to match (or more accurately reverse) the angle of the rafters to meet the vertical OSB sheets.  Once again, the carpenter’s square (small version) comes to the rescue:
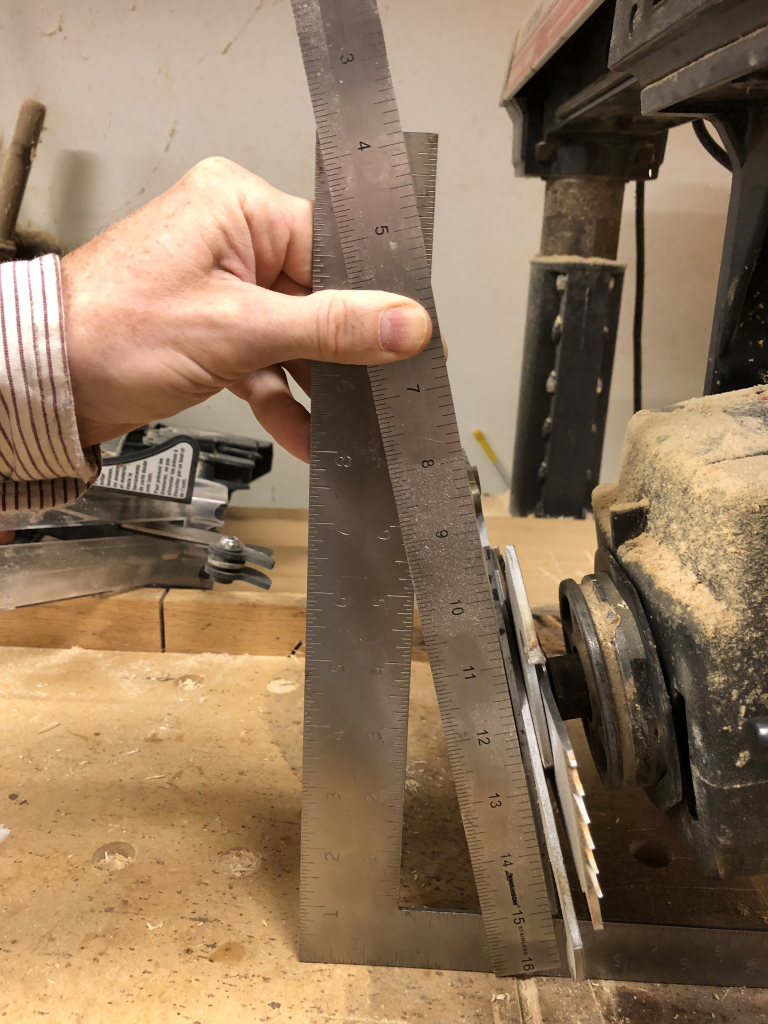
2020-08-01 Dado Blade Angle Setup

Just a word of caution: I had to take the blade guard off to swap the standard blade on the radial arm saw for the dado blade, and to set the angle.  Do what you need to be safe here.  Unplug the saw if you have to.  Put the blade guard back before you plug it back in.  Never stand in line with the blade when cutting.  You know the drill… er, the old saws… yeah.

So here’s what the old and new solutions look like side-by-side as I was pulling one out and replacing it with the other.
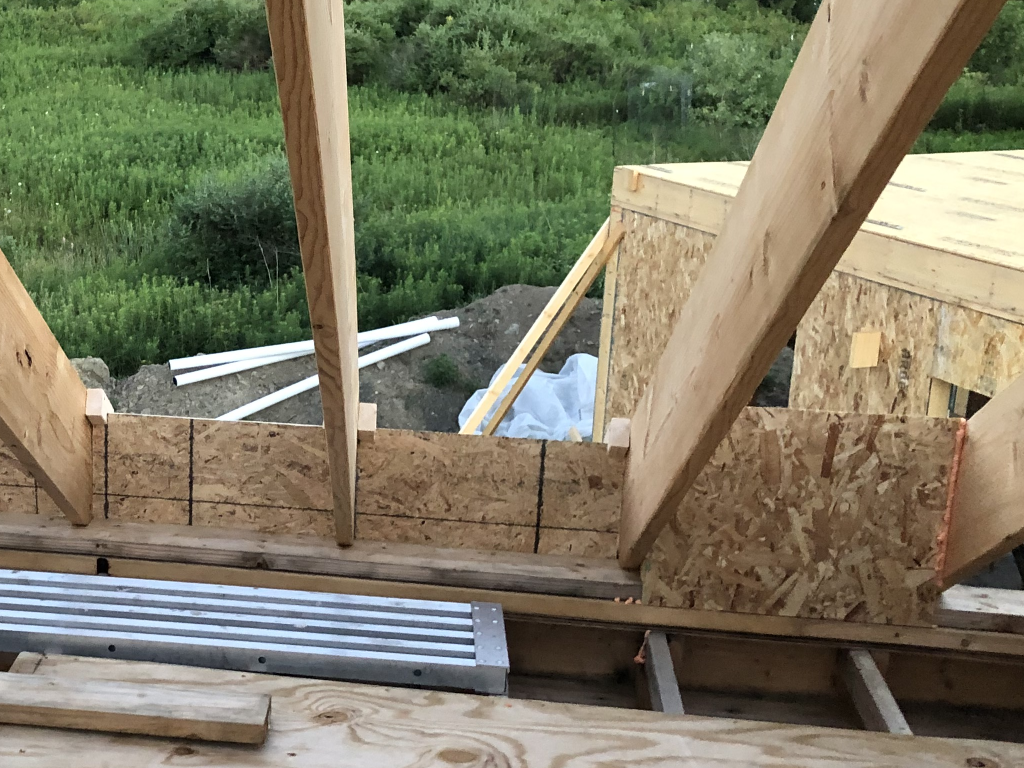
2020-07-28 Two Blocking Solutions


See Foam Spray

When I talk about “foam spray” I’m not trying to conjure images of the (original) Little Mermaid, and I’m not even talking about the cans of compressed foam material that came with my SIP order.  What I’m actually referring to is the rather unexpected spray of small foam particles that I’ve been contending with since I began working with my new SIPs.

Murus panel router

Each SIP needs to be routed out at the top and bottom and at every edge where structural components (such as window frames) need to be added.  Murus Co., my SIP vendor, offers a cleverly designed tool to rout out the foam to the exact depth of a 2×6 member.


What they don’t tell you is that when you do this, it snows.  Not the cold stuff, because it’s snowing insulation after all.  Do not try this on a windy day.  To help with this, I decided I needed to make a separate tool, which is a foam-catcher.  I plug the shop vac directly into the end of this, and it does help contain the foam spray.

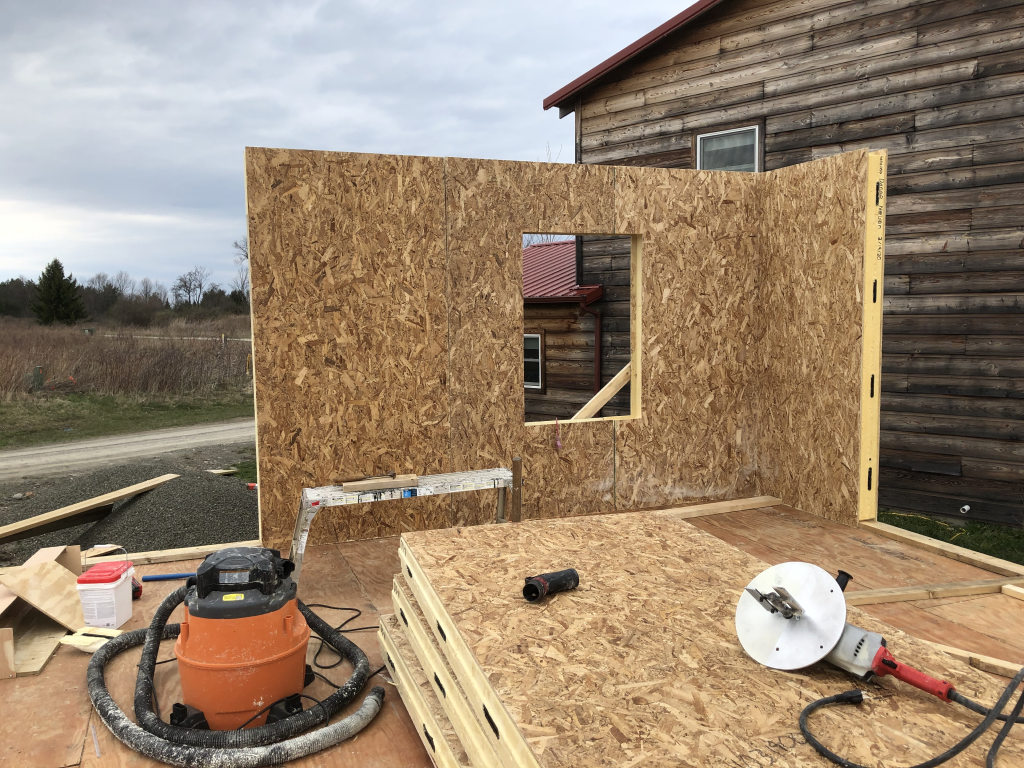
Foam spray containment boxHowever, the best solution so far has been actually getting up the first walls.  Once I had my corner in place (with some help from my more experienced neighbor Dane) I was able to get a few panels in place myself.  This shielded from enough of the wind that further routing inside the partial walls was relatively contained.

First four SIPs
Apr 19: First four SIPs installed

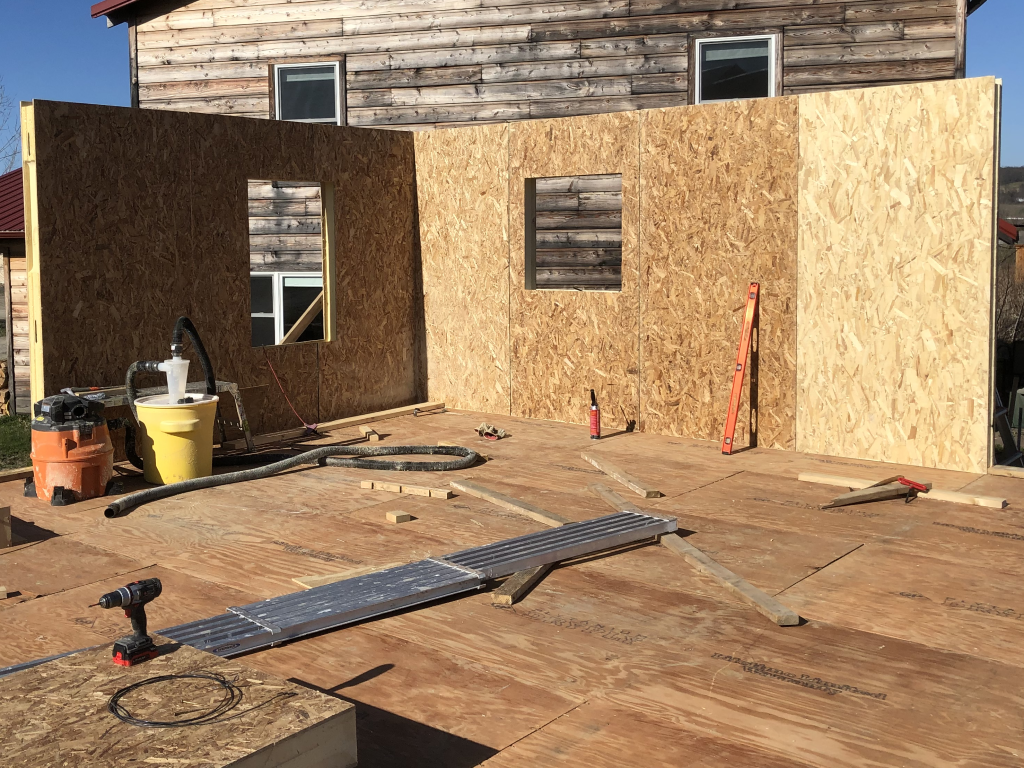
After this, I began installing more SIPs on the east wall.  By the end of the day on Apr 20, I had seven SIPs in place and I thought all was going rather well.

Apr 20: Seven SIPs

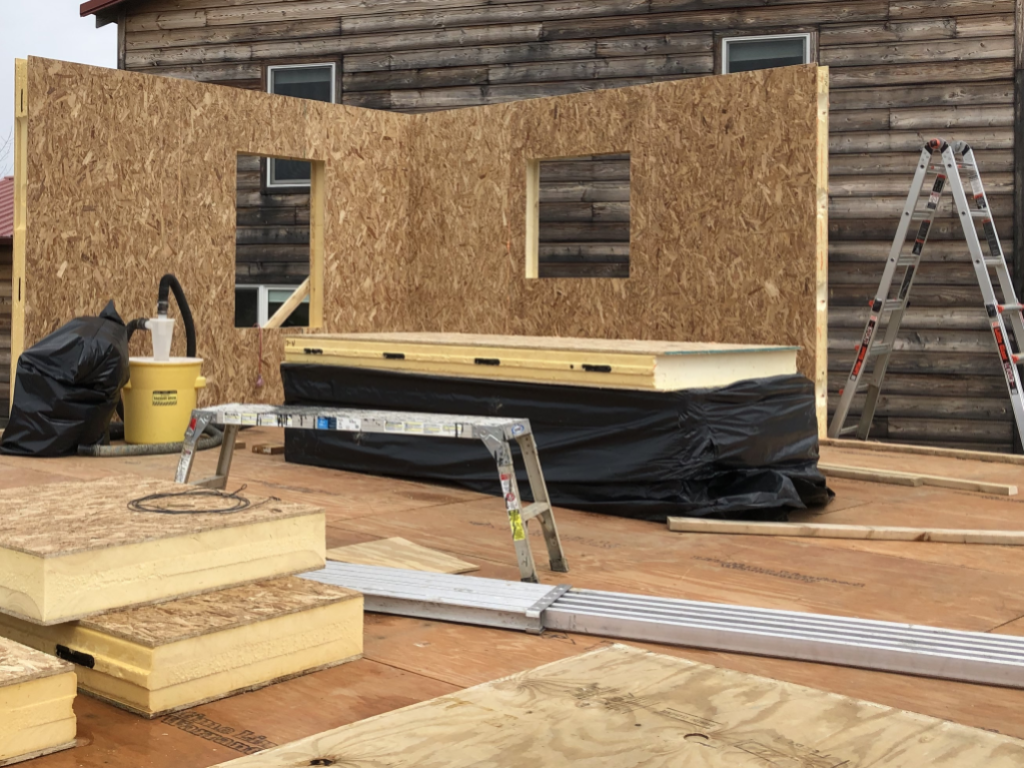
That was until I woke up on Tuesday morning and realized that I had forgotten to include the structural members in the center of the east wall which would provide the primary vertical support for the roof ridge beam.  Ugh…  So after attempting to pull out the ring-shank nails unsuccessfully, and a trip to the store to pick up a better tool, I was thrilled that I was actually able to pull out all of the nails rather easily.  Getting the panel loose from the foam which had glued it in place was a bit more difficult.  (Okay, a lot more difficult, it took longer to get it free than it took to get out the ~2 dozen nails.)  But eventually I was able to take it down, leaving me back at six nearly-completed SIPs on Apr 21.

Apr 21: Six SIPs

The SIP I removed (on the top of the wrapped stack) is still in relatively good condition; I was worried that I was going to have to cut it loose, but this turned out not to be necessary.  nevertheless, out of an abundance of caution, I’m going to put it aside for use in a non-load-critical location, probably on the second floor, just in case the process did invisible damage to the structure.  I’ll take a brand new SIP to replace it in this structural location on the first floor.

Unfortunately, the weather has now gotten too windy, snowy, rainy, and cold to proceed for a few days.  (The foam is supposed to be applied at temperatures over 50°F, and I doubt I could manage to hold onto a 4×8 SIP with 20 mile-per-hour winds.)  So I’m working on some other home projects for a few days, and getting this blog up to date!


Wow, I’m Floored!

For the last couple of weeks it has been “damn the winter weather, full speed ahead!”  And somewhat to my surprise, I managed to get the floor panels I designed (and wrote about here) completed.  Apparently after repeated exposures, my hands finally got used to working in 37°F (2.8°C) weather, and I didn’t feel cold any longer.  My ears were protected by 3M™ WorkTunes™ headphones, which may have been the single best tool investment I have yet made on this project.  Certainly the most consistently utilized, particularly with Spotify keeping my ears happy and not merely warm.

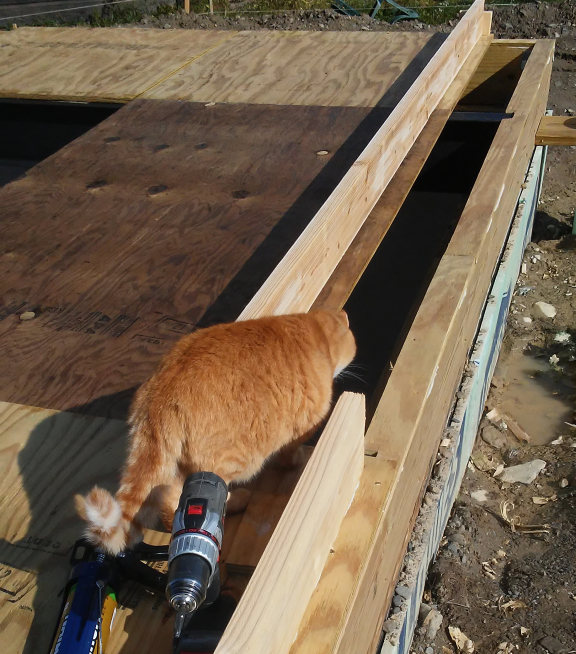
A big ($3000) order of materials was delivered in late October, and I immediately started trying to get the flooring in place.  Zephyr was intrigued.

Curious cat is curious

At first things went pretty quickly.

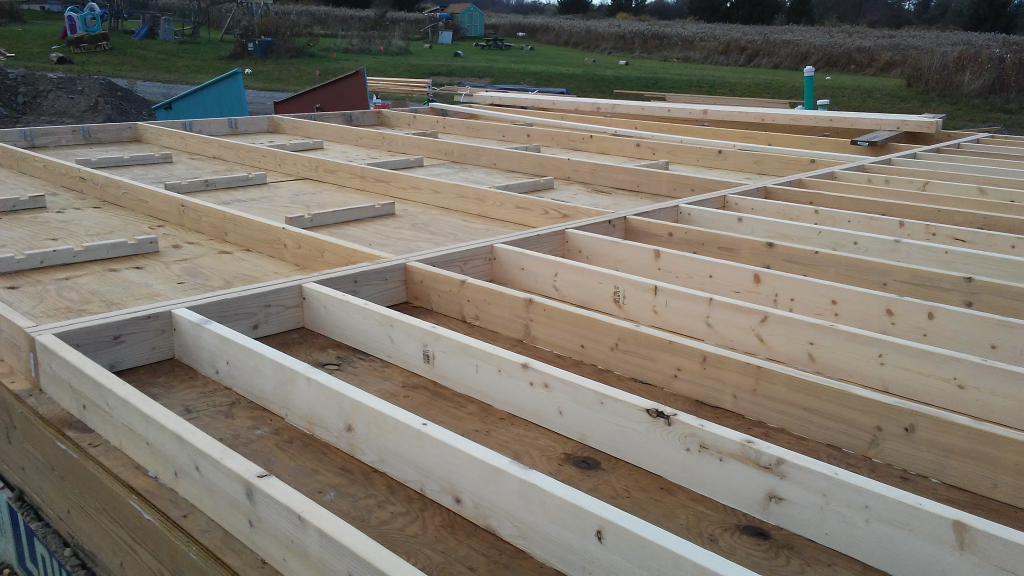
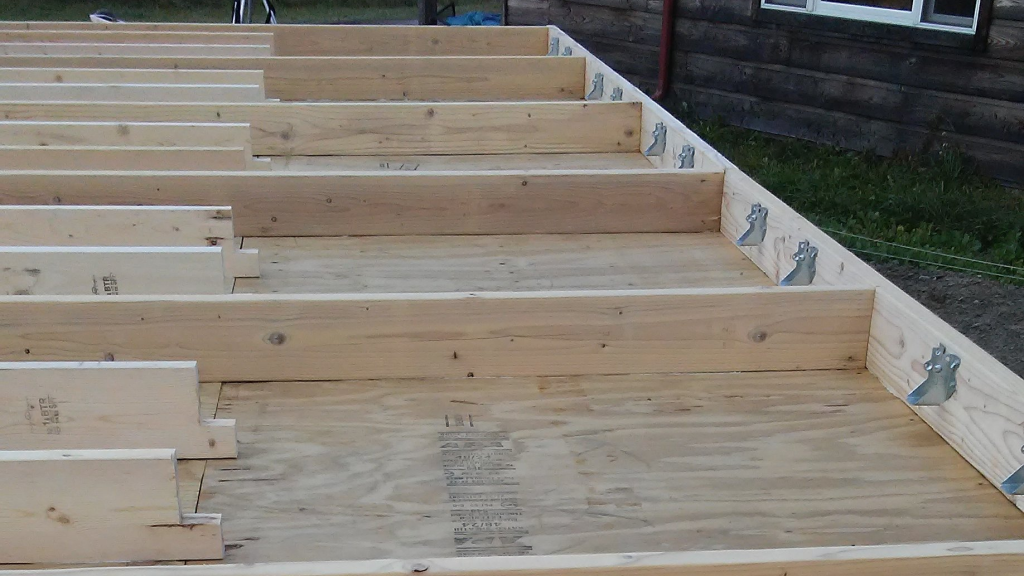
However, my birthday party happened just a day or two into getting the materials, so it was almost November before I really got going.  Below you can see the bracing ready for the 2x4s to come in above the PIR foam board, and the 2×6’s used for every third span (west side) and for all of the 7′ spans (east side).

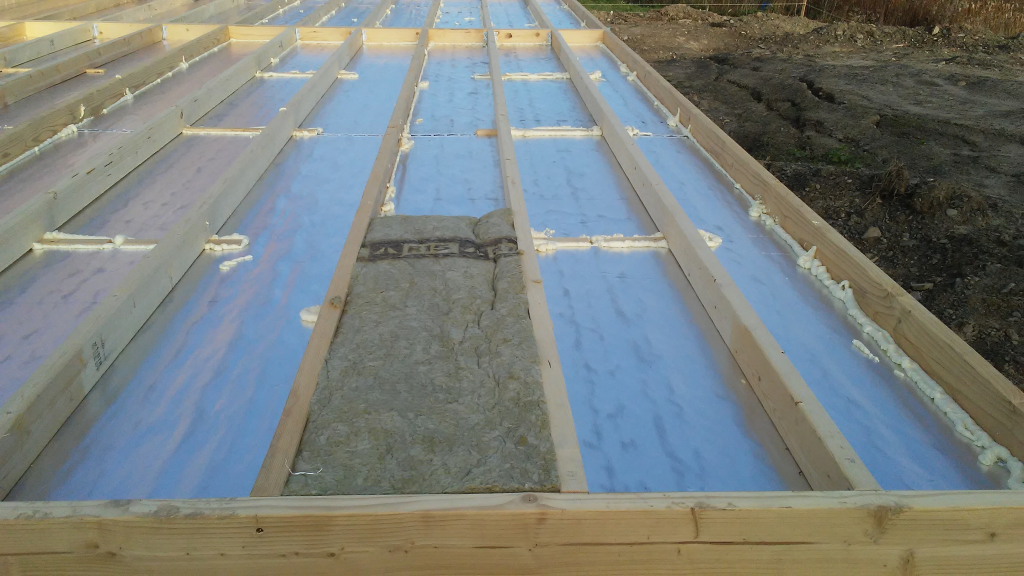
Here is some of the PIR foam board in place, 2×4’s across the top and on the braces, spray foamed along edges of PIR, as well as the first batt of rockwool.

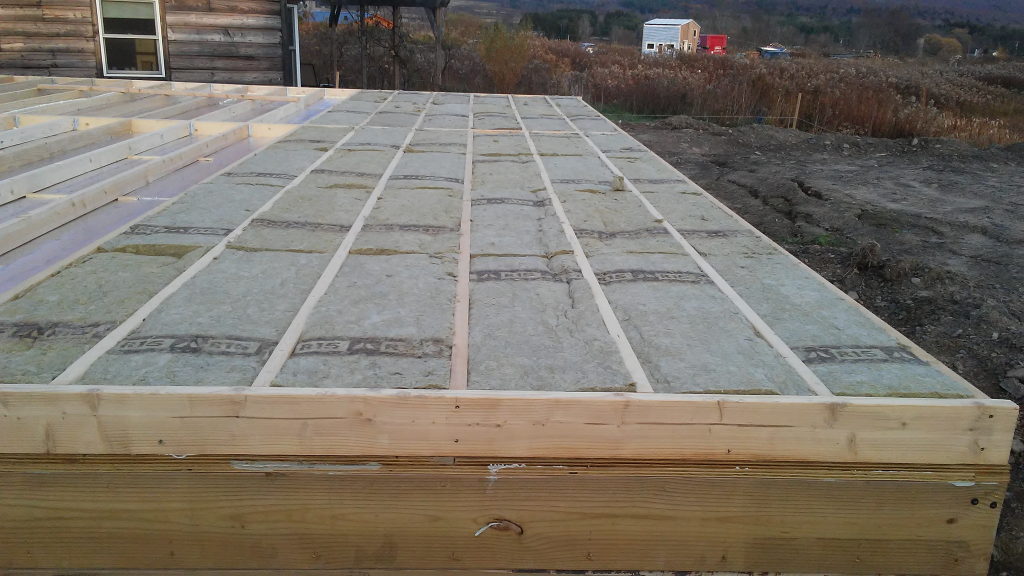
And finally here is what it looks like with all the rockwool in place.

Then I started to get the actual subfloor laid on top.  Unfortunately, not very long into this we had our first 4″ snowfall, and thereafter I was spending a lot of time with the shop-vac removing the snow and water that was stuck inside various cavities (either on top of the PIR board, or on the PT plywood bottom layer where the PIR board was not yet laid).  Furthermore, laying the tongue-and-groove subflooring with the appropriate staggered (and thus, diagonal) pattern turned out to be extremely time consuming.

It’s probably worth sharing that the necessary tools for this are one (or more) sacrificial 2×4’s and a sledgehammer.  You lay the 2×4 against the edge of the subfloor plywood (best if it’s the groove side) and whack the crap out of it to get the plywood to move across the glue and into place.  I shattered one 2×4 along the way and beat another one beyond the point of further usefulness.  Also, on occasion, you may want wood shims (used to force the tongue up into the groove) or a wonderbar weighted down with a heavy piece of PT lumber (used to force the groove plywood down onto the tongue).  Or, you could do this with more than one person, in which case, you get someone to stand on the edge to keep it aligned while you whack the 2×4.  This is definitely one of those “better done with a team” jobs.

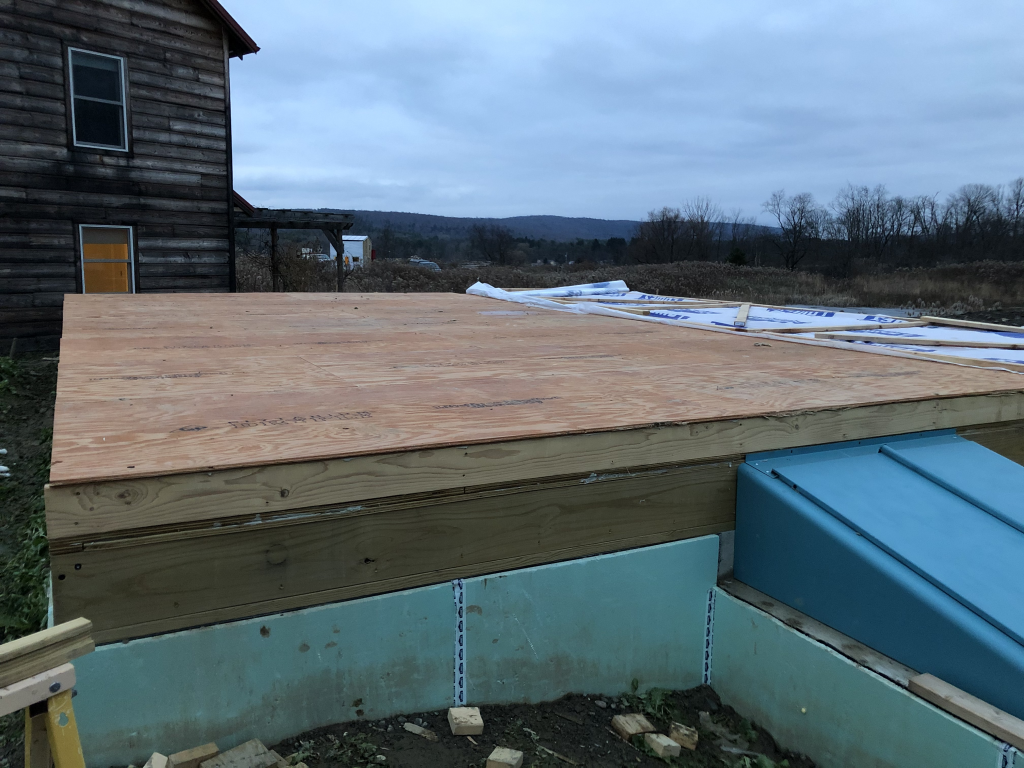
But, in the end, I managed to get it all in place.  I still want to come back and add the house-wrap to the remaining 2/3 of the floor, to keep water out over the winter, but at least the main job is now complete!


Was it worth it to do all that extra complex framing for the 10% improvement in insulation?  I’m not sure – maybe not.  I’m estimating that adds up to maybe 85 BTU/hr or 25W of heating saved, whereas the remaining total loss through the floor is perhaps 875 BTU/hr or 256W.  The R-41 SIPs would have been closer to 553 BTU/hr for a savings of 94W.  (All these numbers may be lower if the equilibrium temperature in the basement is higher.)  But I learned a lot of interesting things along the way.

SIP Sliding Away

This week, I threw up my hands in frustration and did a small redesign.  I have been planning all along to use SIPs for the first floor flooring (above the basement).  Unfortunately, I have been so busy with other projects like fencing our back yard against deer and dealing with my duties as volunteer Treasurer for my community, that I didn’t actually get an order placed.  Add to this that the time frame for getting SIPs delivered turned out to be 3-4 weeks ARO (“after receipt of order”), this would have put me receiving the materials somewhere around when the average daily high temperature crosses below 50°F/10°C and the snow starts to fly.  Plus, the quotation came in about $2,000 over my budgetary estimate.  I could save some of this by using a lower insulation SIP – which would probably be OK – as the basement will generally stay closer to ground temperature than outdoor temperature, I won’t lose as much heat through the floor as through the walls.

The local code enforcement officer indicated that I needed to either get a floor in place or put up a (rather permanent-sounding) fence around the site before the winter, and I didn’t want to spend a whole lot of money on fencing if I could just get the floor on.

To top it off, I was having trouble getting a useful structural load analysis that reflected my intended usage.  Somewhere in here, while I was busy trying to compute the transverse load for a 4′ span from the modulus of elasticity of extruded polystyrene, I turned a corner.  Was this really worth going out on a limb and then jumping from treetop to treetop over?  Load tables and beam strength calculations for wooden joists were incredibly easy to come by.  And they showed that all it would take was a 2×6 member spaced every 24″1 to span over 8 feet.  Heck, even a measly 2×4 would span 5 feet.  If these were then reinforced with a bottom layer of plywood (which would effectively prevent the bottom of the beams from stretching and make them even stronger) and topped with subflooring, I would have a structurally sound flooring solution.

It would need to be insulated though.  Polyisocyanurate foam board (often abbreviated PIR) is about the best insulation density you can get in an off-the-shelf product (R-6.5 per inch) and so 4 inches of this would put me at R-26 – exactly where the cheaper SIPs would have put me.  However, that would involve a lot of cutting foam to fit around the structural members.  I was also worried about the thermal bridging from all of the wood, particularly if I needed to space the joists 16″ OC to ensure a rigid floor and not need multiple layers of subflooring to achieve it.

I finally came up with what seemed like the key innovation to me.  If a 2×4 can span over 5′ at 24″ OC or nearly 6′ at 16″ OC, then as long as it’s structurally supported every 4′ or 5′, the 2×4 can actually serve the role as a floor joist.  Adding a 2×6 for every 3rd member would increase the strength further.  The PIR foam board I was looking to use2 is 2″ thick, meaning that it would in principle fit in the difference between a 3.5″ 2×4 and a 5.5″ 2×6, and from there it would actually provide some additional support to the 2×4.  At this point I could get away with only cutting each PIR board a little bit to fit between 2×6 members, and around the supports.

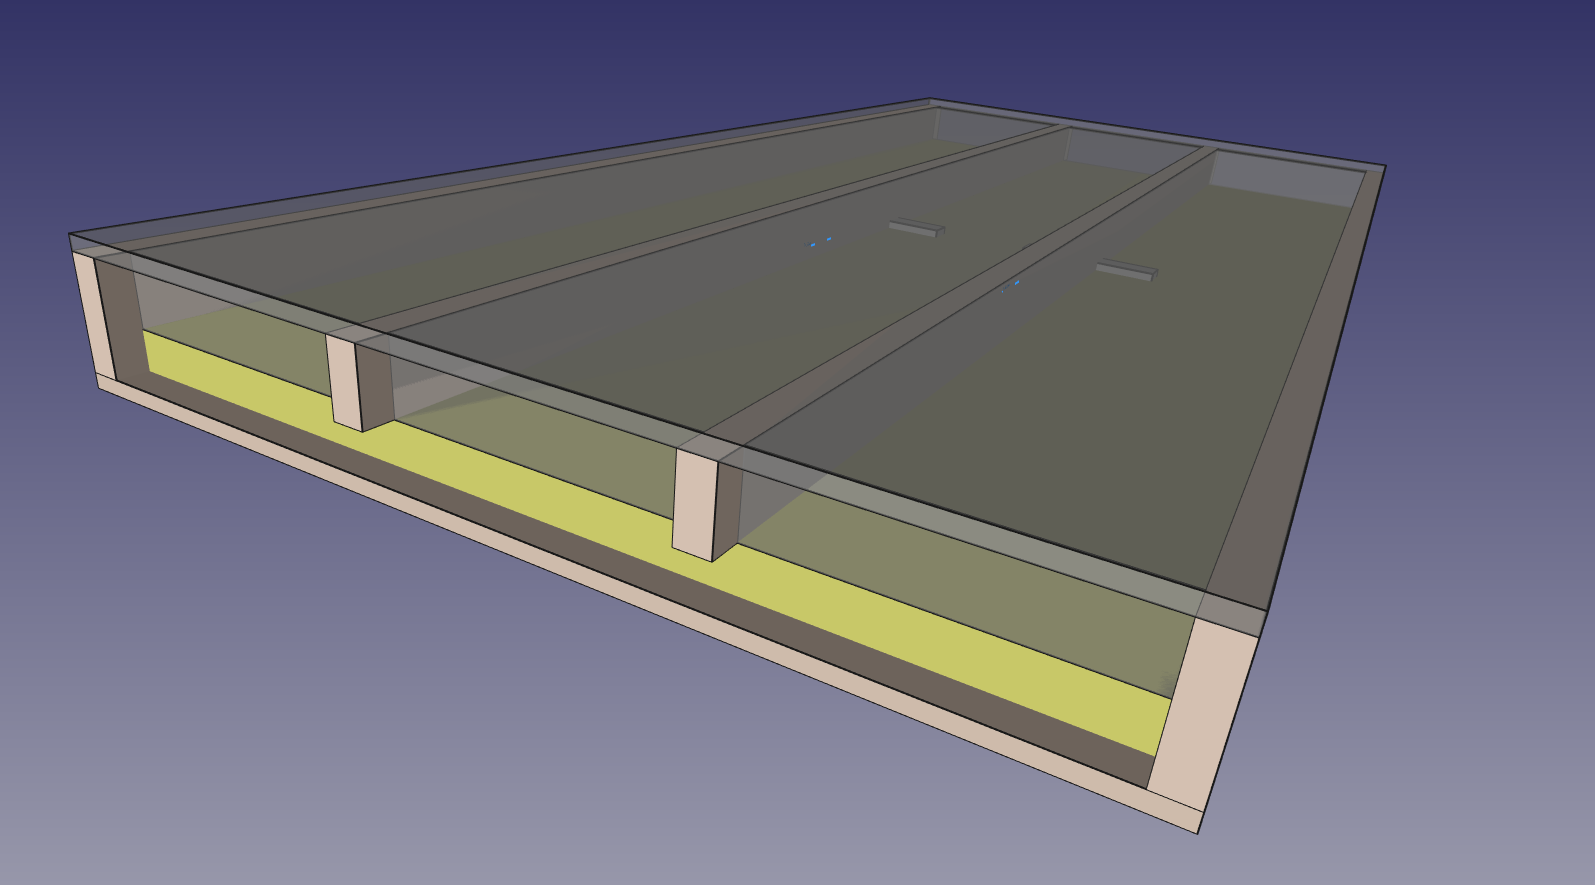
But now I’m only at R-13!  That isn’t very good insulation for a potential 25°F/14°C temperature differential.  Adding batts of 3.5″ rock wool, which is exactly designed for 2×4 spaces, adds another R-15 (total R-28).  The final assembly looks something like what is shown here.

And, I should be able to start getting the parts more-or-less immediately.  And, the whole thing will probably save me some money relative to even the cheapest of the SIPS.  Some extra labor, to be sure, but the sooner I can get started on it, the more likely I am to get this done before real winter hits.

A little afterword about the R-value.  Using data on individual components I’m estimating the average R-value for the entire floor at 25.9.  It’s interesting to see that 77% of the heat loss is through the two layers of insulation; 14% of it is through the 2×6 joists; and 8% of it is through the 2×4 joists.  Thus even though the 2×6 joists account for less than 5% of the total area, they’re responsible for a significant fraction of the heat loss.  If I had used 2×6 everywhere, the R-value would have been lowered to 23.6 (almost 10% worse) and the joists would have been 30% of the loss.


  1. The construction terminology is 24″ OC standing for “on center” – that is, the centers of the boards are 24″ apart.
  2. I don’t really care for Dow but the appears to be the only suitable PIR I can get locally.