Aug 2020: Upon The Roof

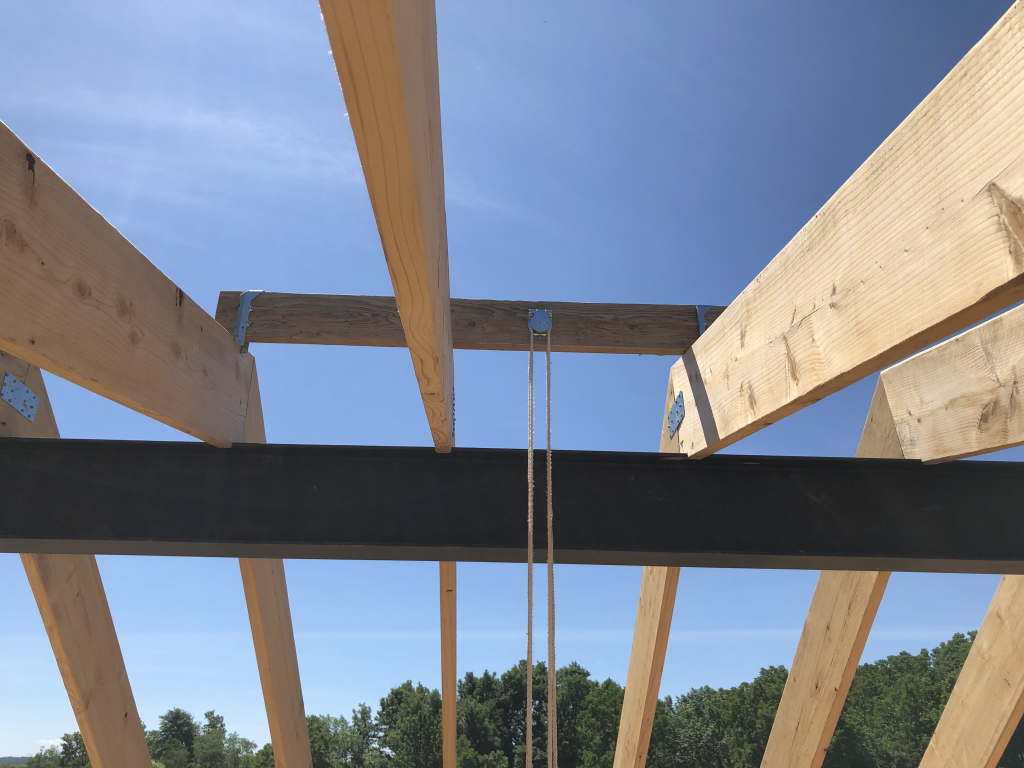
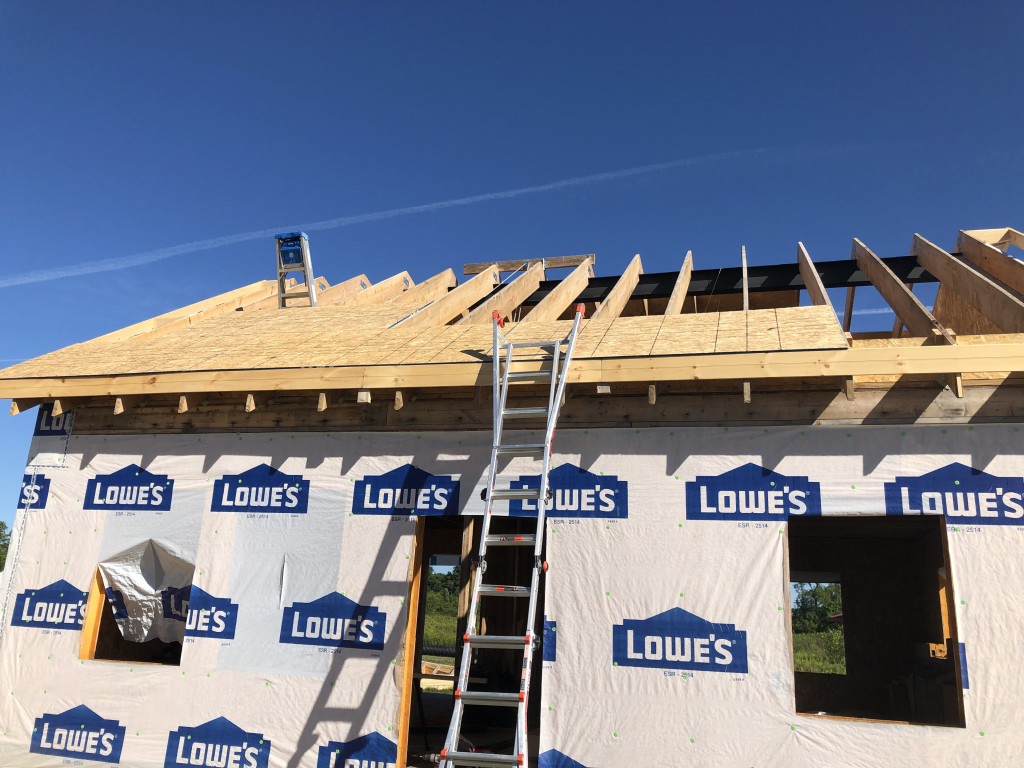
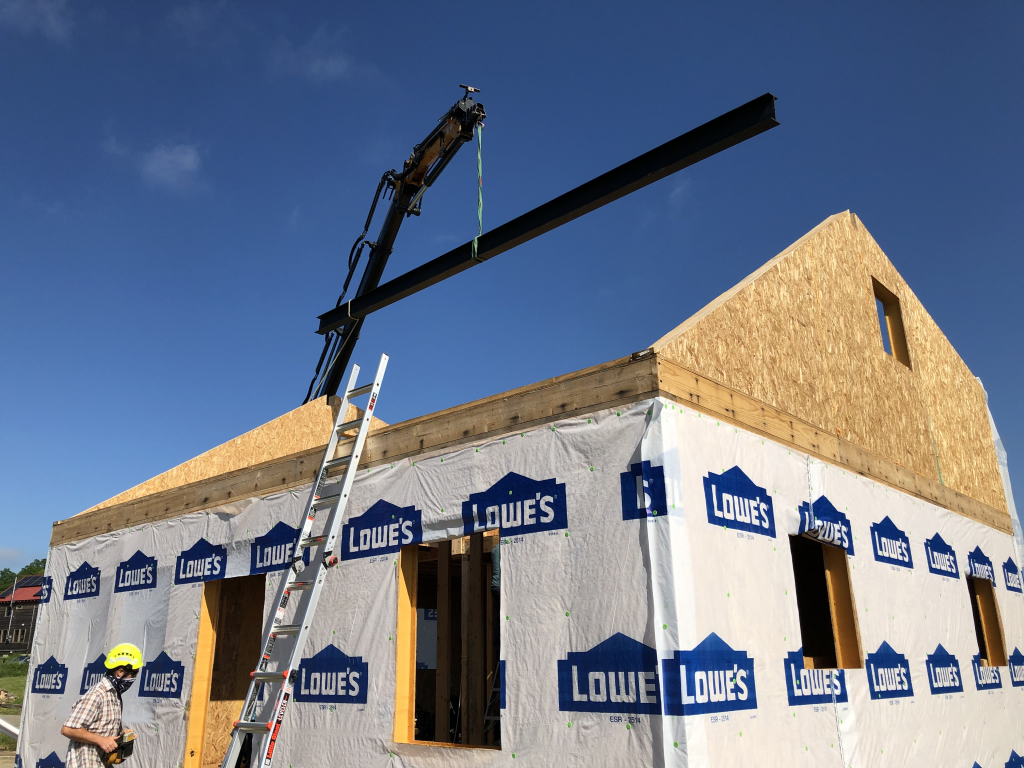
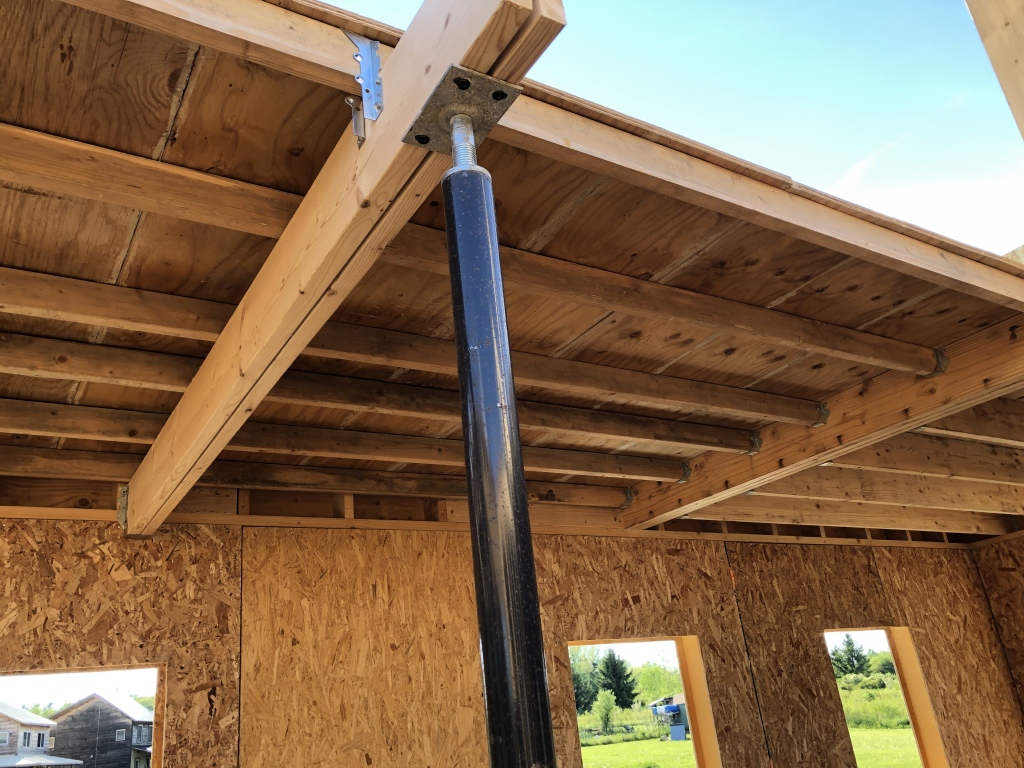
In August I started putting up the roof decking.  To get the rather heavy OSB sheets up to the second story by myself, I relocated my block-and-tackle that I had been using for the SIPs onto the top of the rafters.

2020-07-18 Block and Tackle for Roof Decking

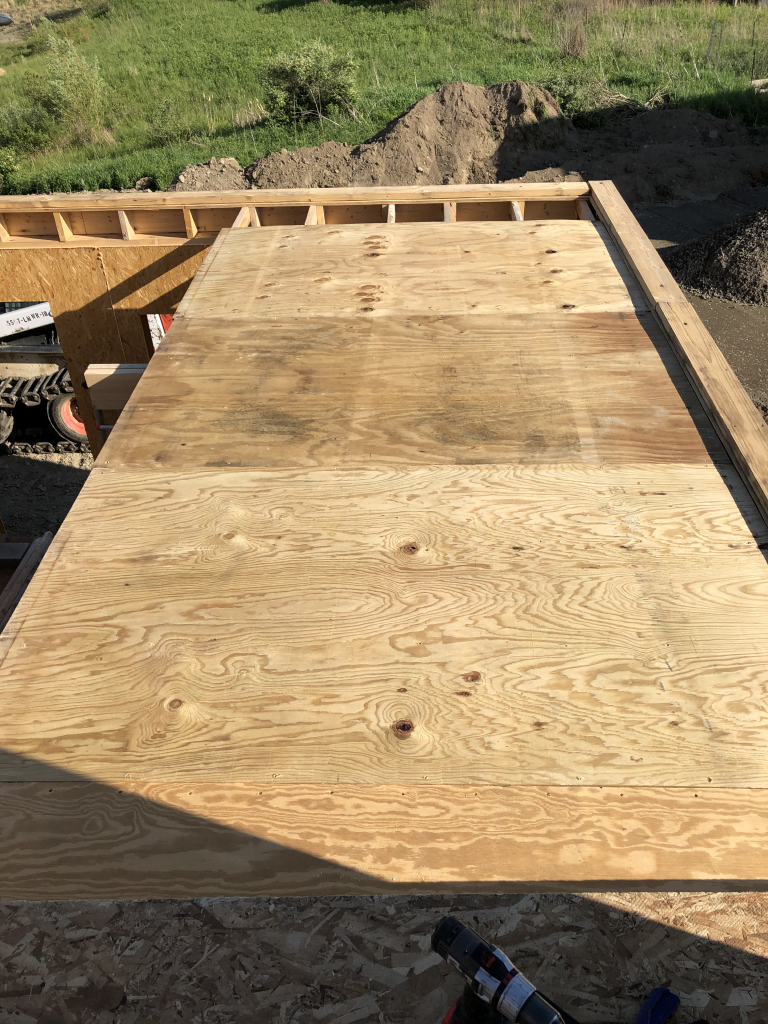
I started hauling material up and began placing the first few sheets on the shallower north side.  I found that even with the 3:12 slope, I needed to attach ropes to the pieces to ensure they didn’t simply slide off.  I got my first sheet up on Aug 2, but being up there that close to a ~15 foot drop was pretty nerve-racking.  Back on Jul 15 I had ordered quite a bit of safety equipment from the aptly named Knot and Rope Supply… but there was a long COVID delay.  I kept gradually putting up sheets on the less-steep-north side with jury-rigged safety equipment.

2020-08-08 Roof Decking
2020-08-08 Roof Decking with Spacer Nails

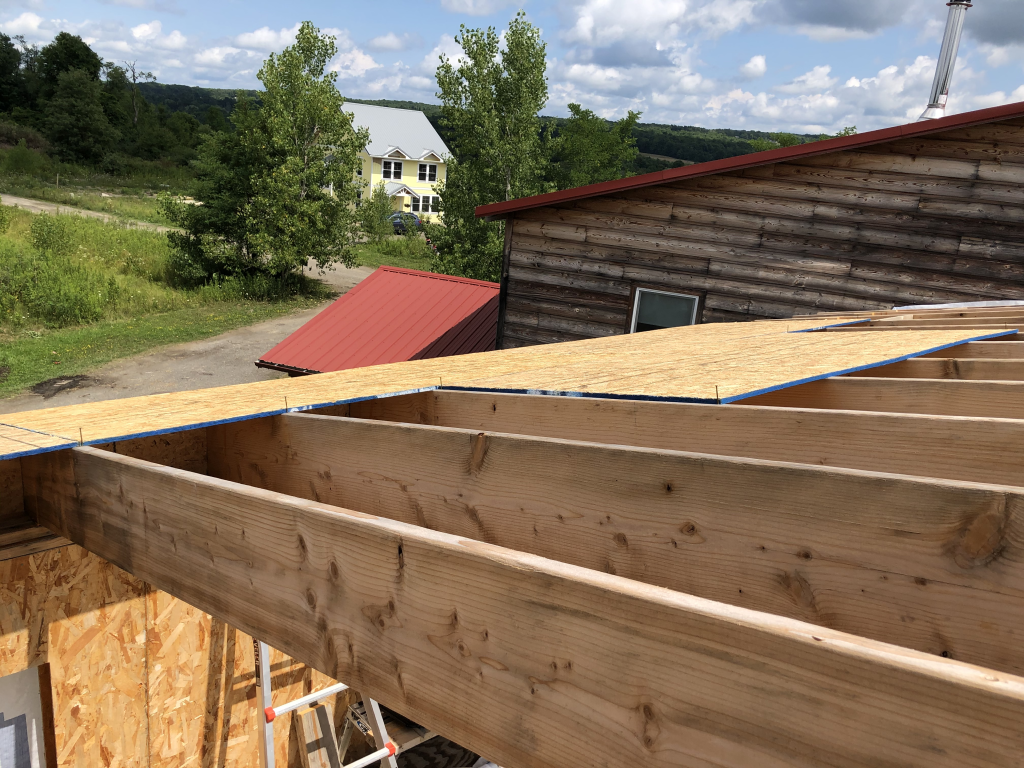
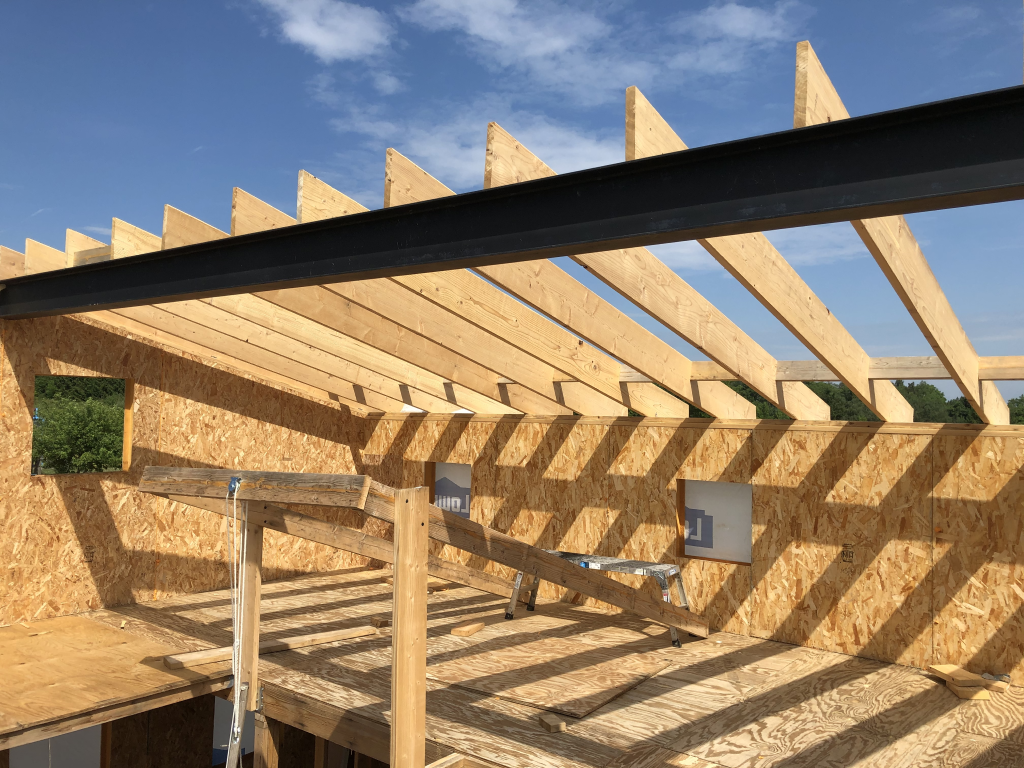
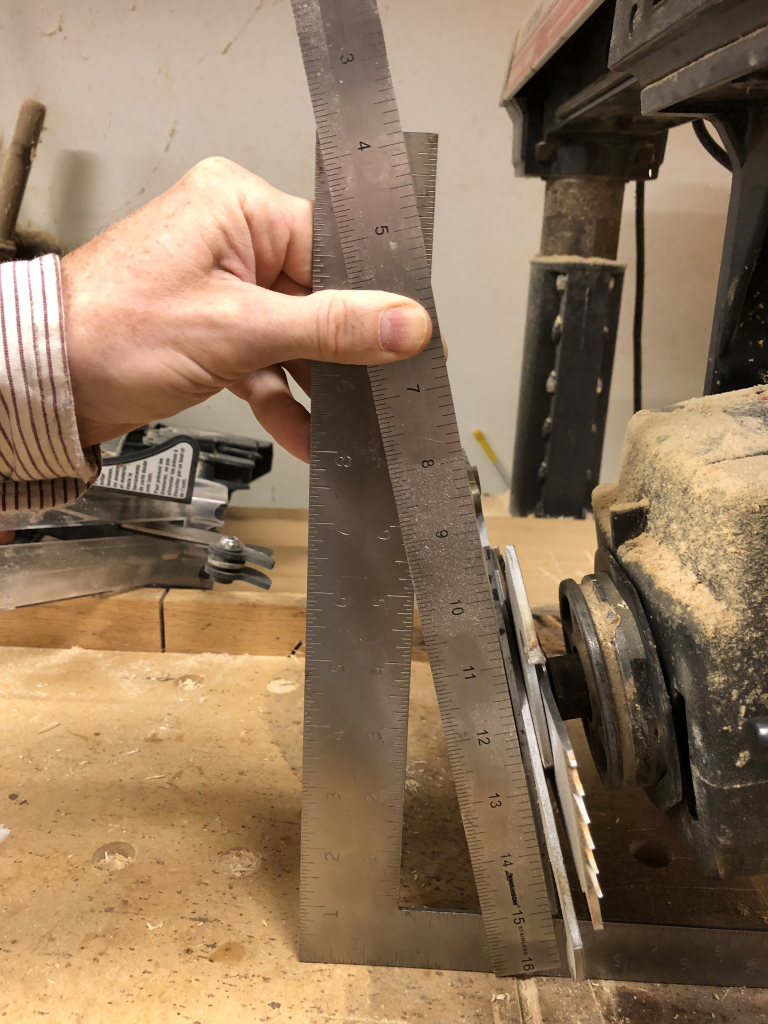
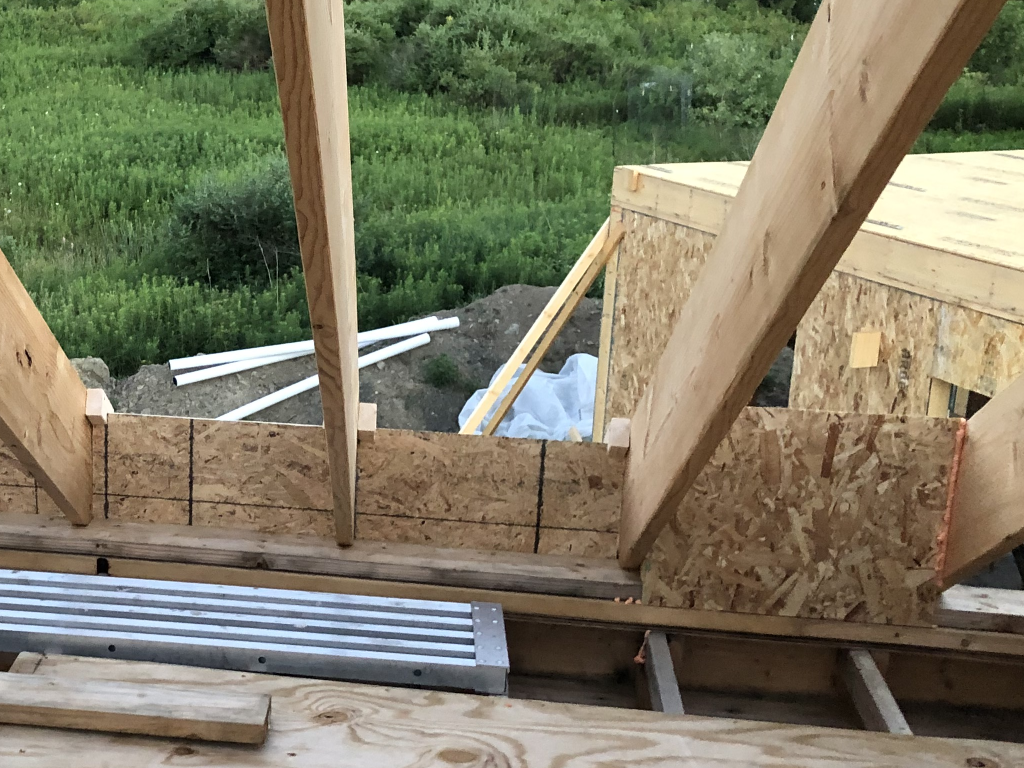
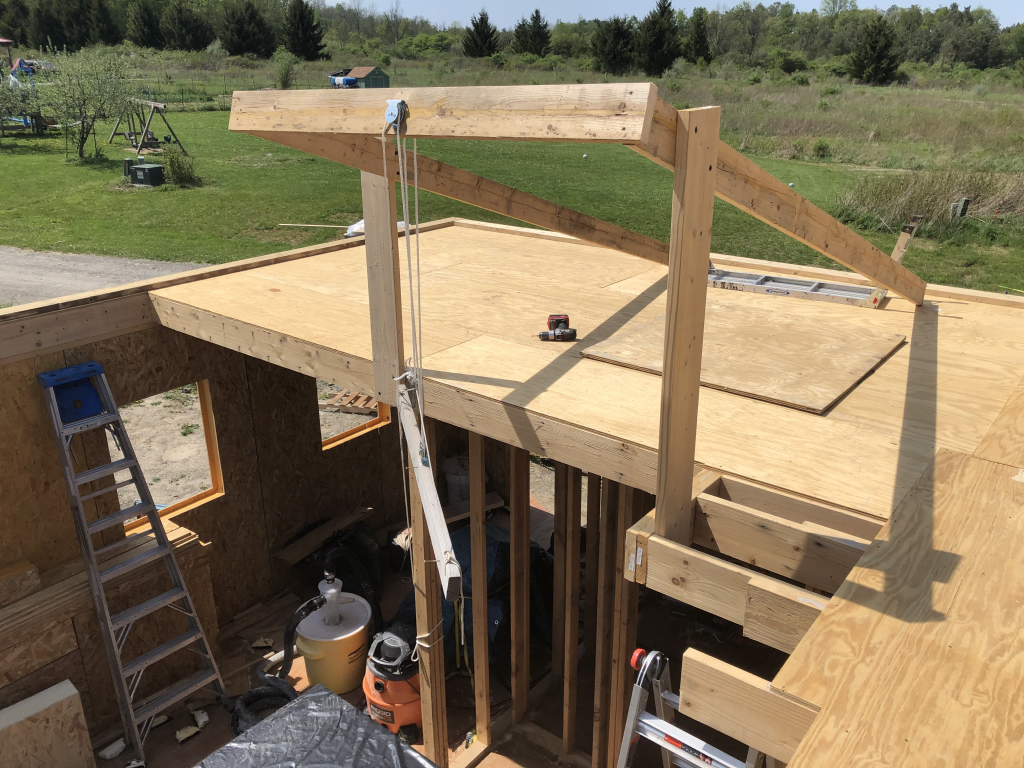
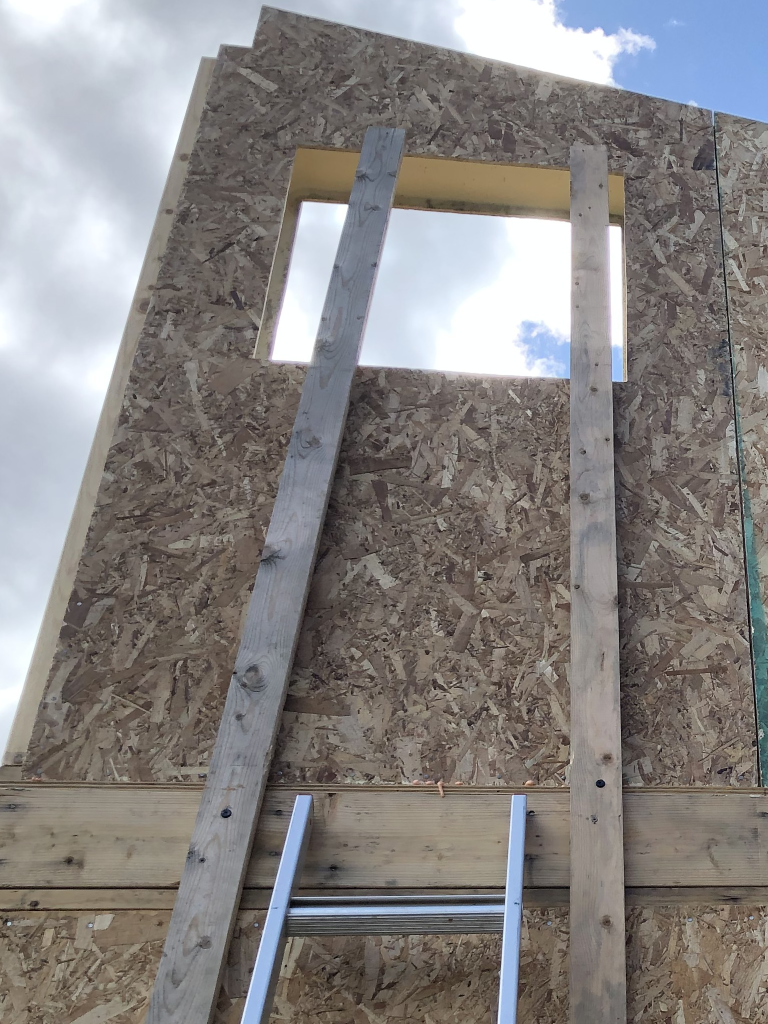
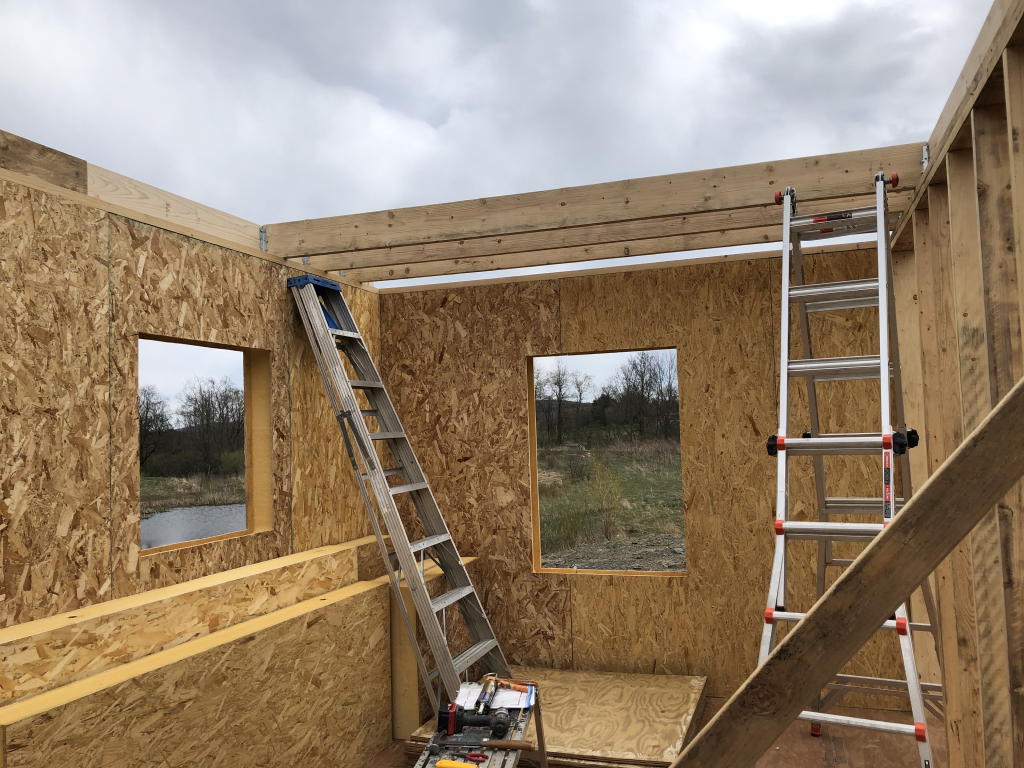
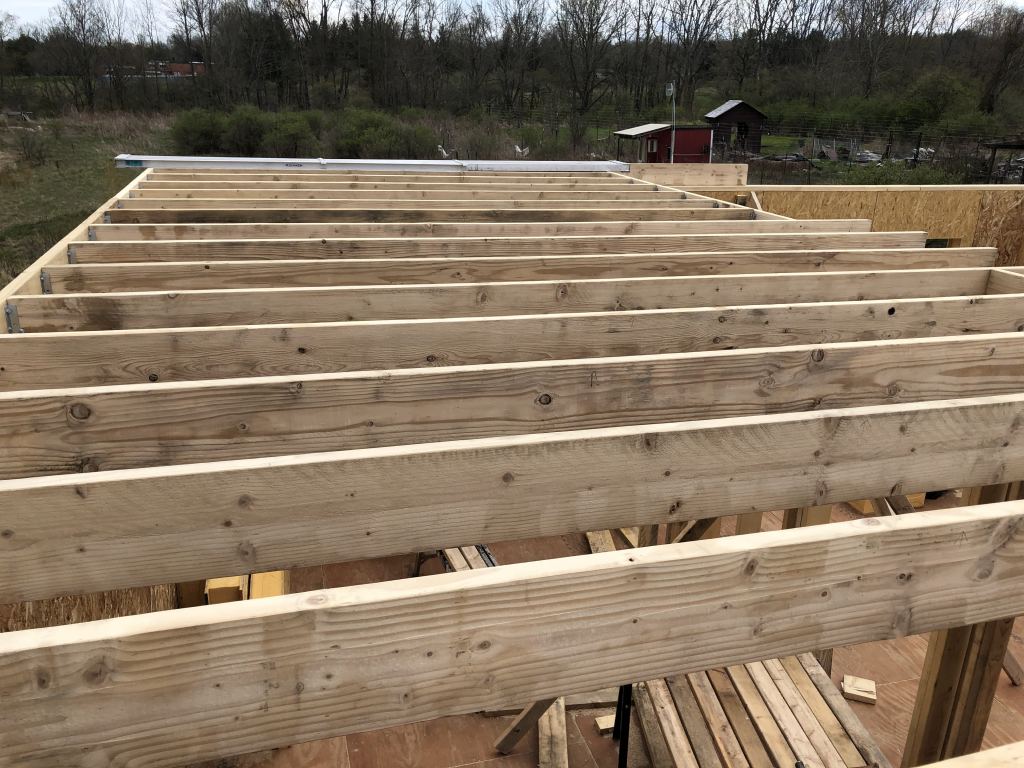
One of the things worth noting is that roof decking needs some gaps to allow for expansion, to prevent buckling.  The OSB is actually slightly undersized to account for this.  The gaps are supposed to be about 1/8″ on all sides, which happens to be almost exactly the diameter of an 8d (eight penny) common nail.  If you look closely enough at the image above you can see the nails that were driven in at various places to ensure this space.  The other thing that I had to do in some places was to push the rafters into alignment – 16′ long boards aren’t perfectly flat, and everything is easier if the spacing is more uniform.  You can see the long clamp in the photo below being used to push two rafters apart.

2020-08-08 More Roof Decking

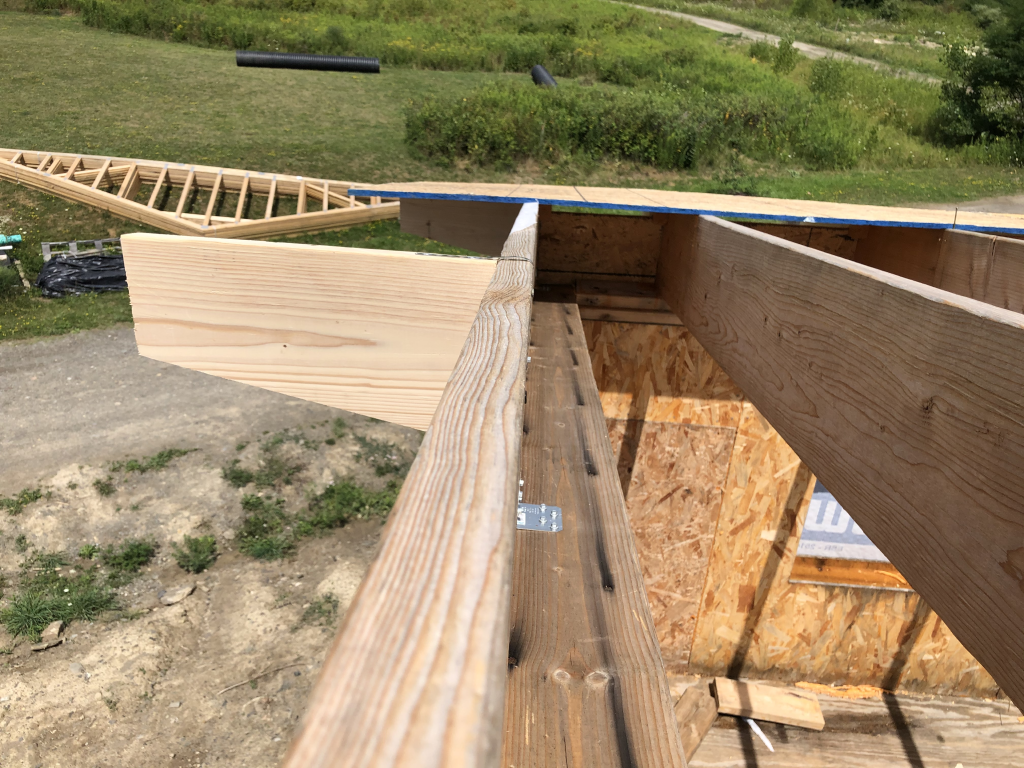
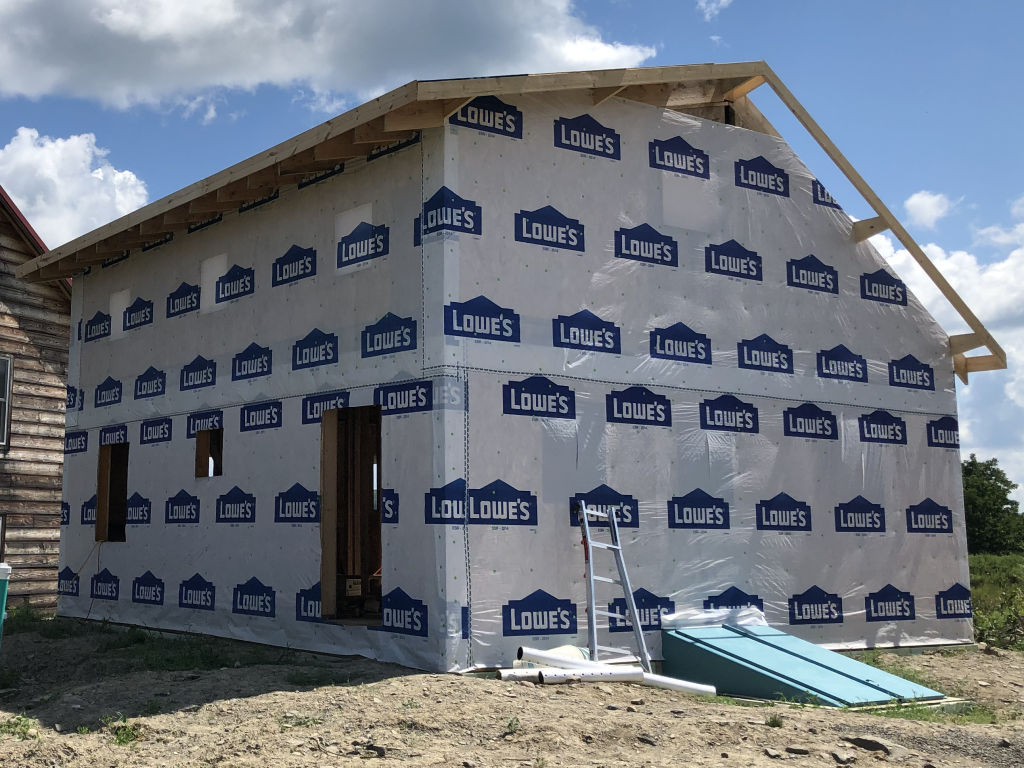
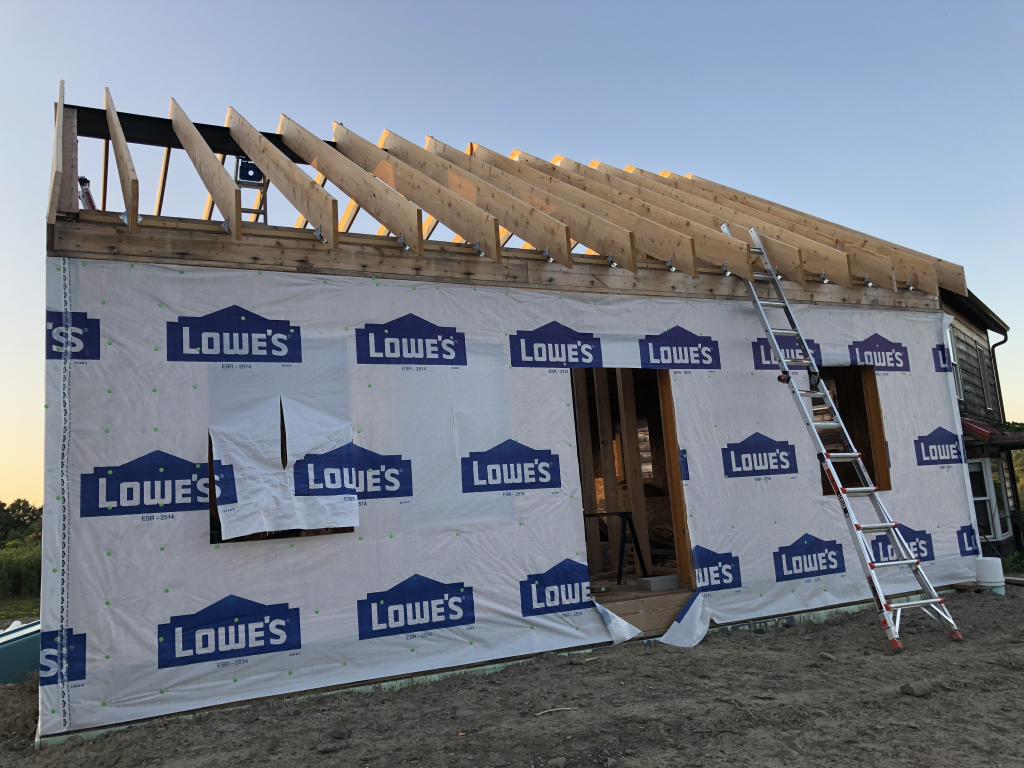
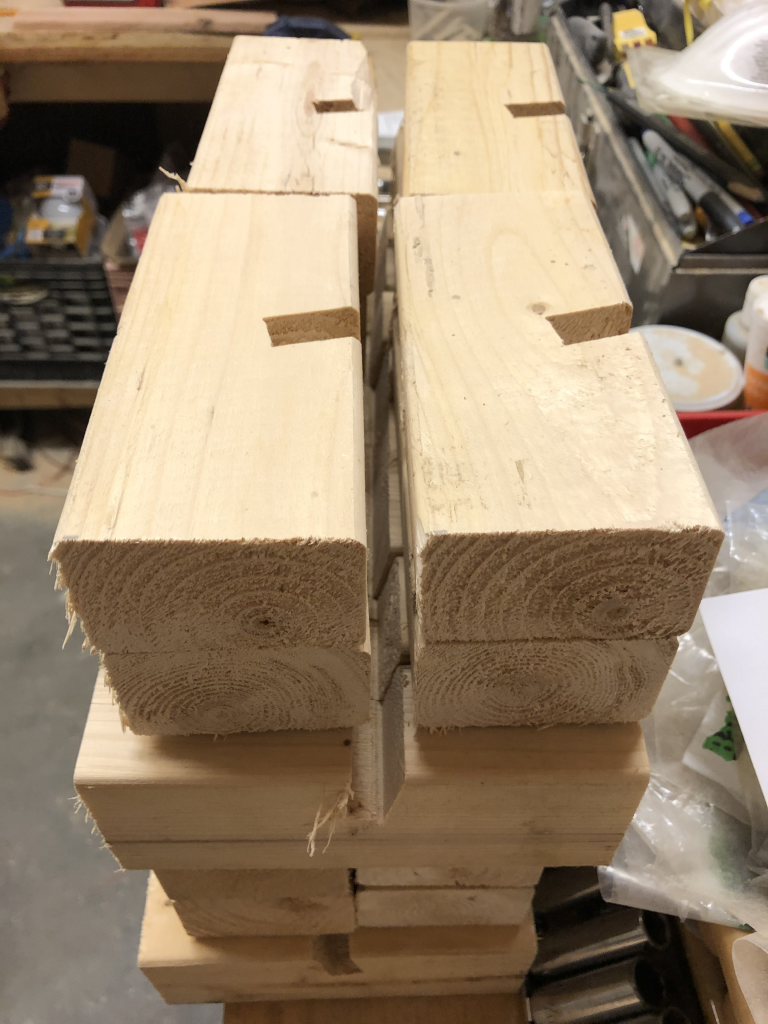
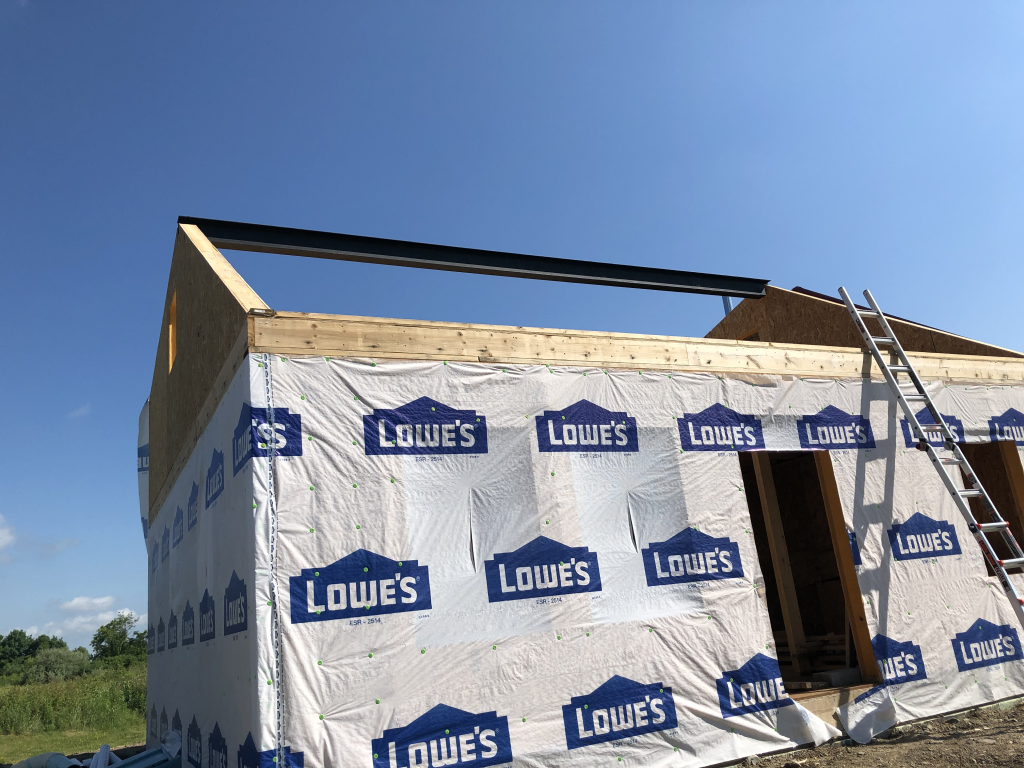
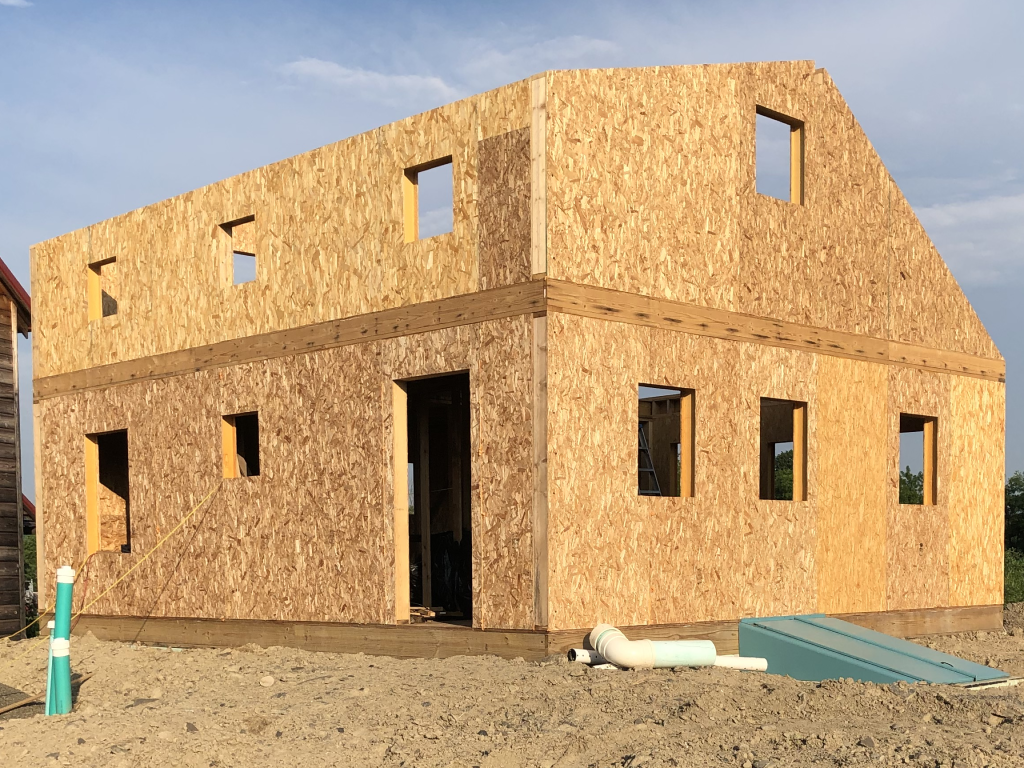
Still, before I spent too much time up on the roof, and particularly on the steep south side, I wanted that safety gear. During the delay I worked on some slightly less treacherous things.  I also had to add extra gable end rafters so that the roof would extend another foot and a half on each side to form a drip edge.  Again, lots of safety ropes, because I was trying to hold 2x6x16’s essentially in mid-air while they were screwed into place.  Sorry I don’t have a video, I’m sure it was quite a sight.  Below you can see a few of the blocks that attach the gable end rafter to the final on-wall rafter.  (Also, entertainingly, you can see on the ground in the background the kind of roof trusses that are used for most of the homes here—did I mention that another house is going up adjacent to this one?—if you want to build a roof the “easy way.”)

2020-08-08 Support Boards for Gable Ends

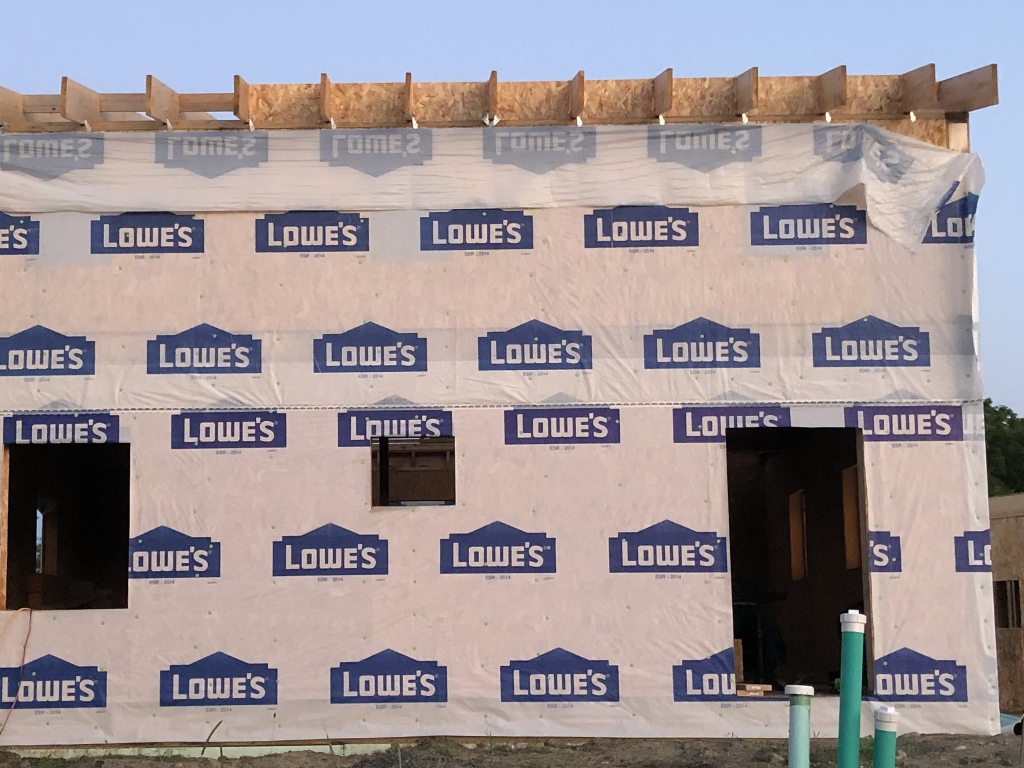
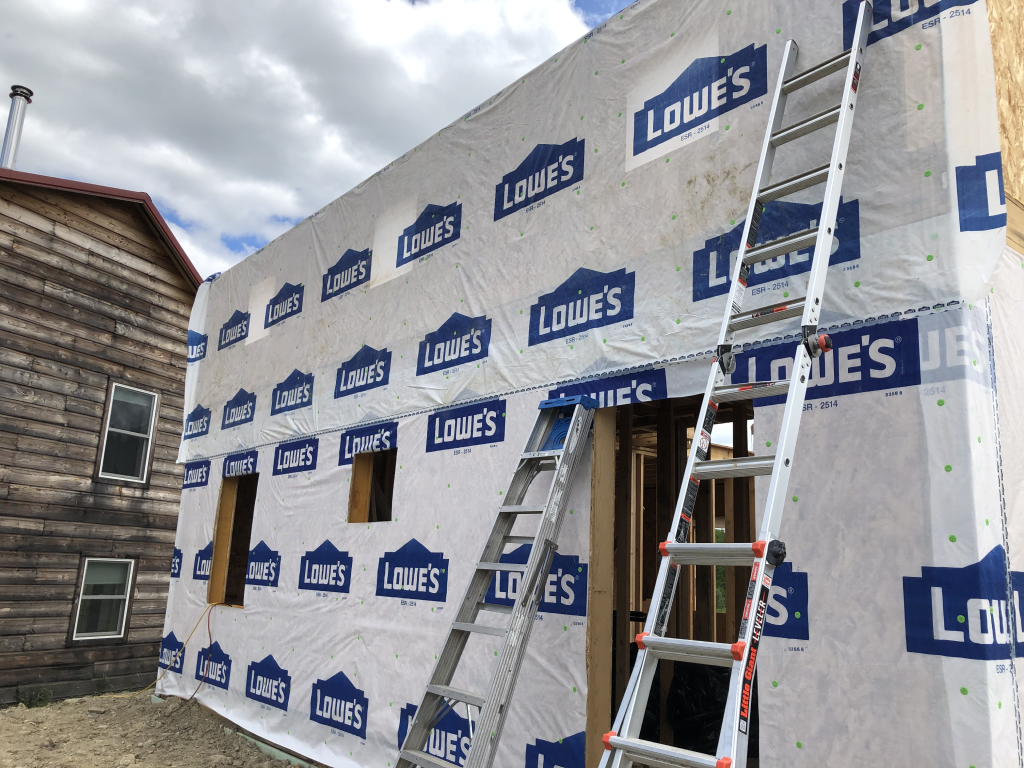
I worked on finishing the house wrap on the gable ends.  I also put up some of the fascia, which I could do on a ladder from below.

2020-08-16 House Wrap, Gable Ends, and Fascia

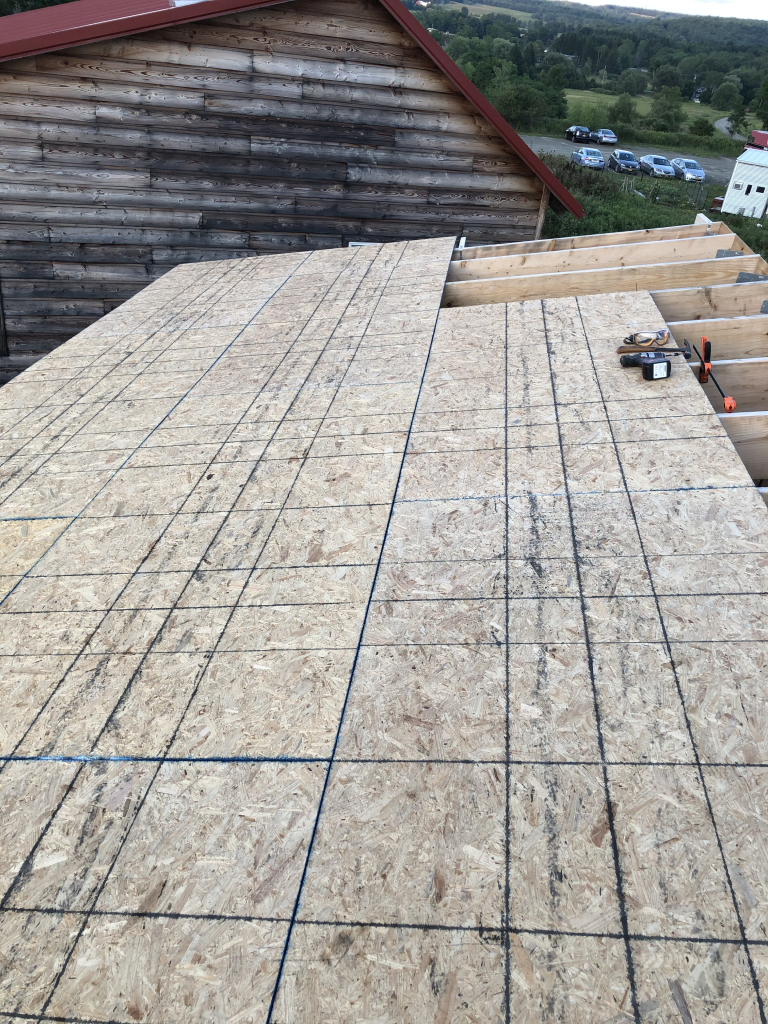
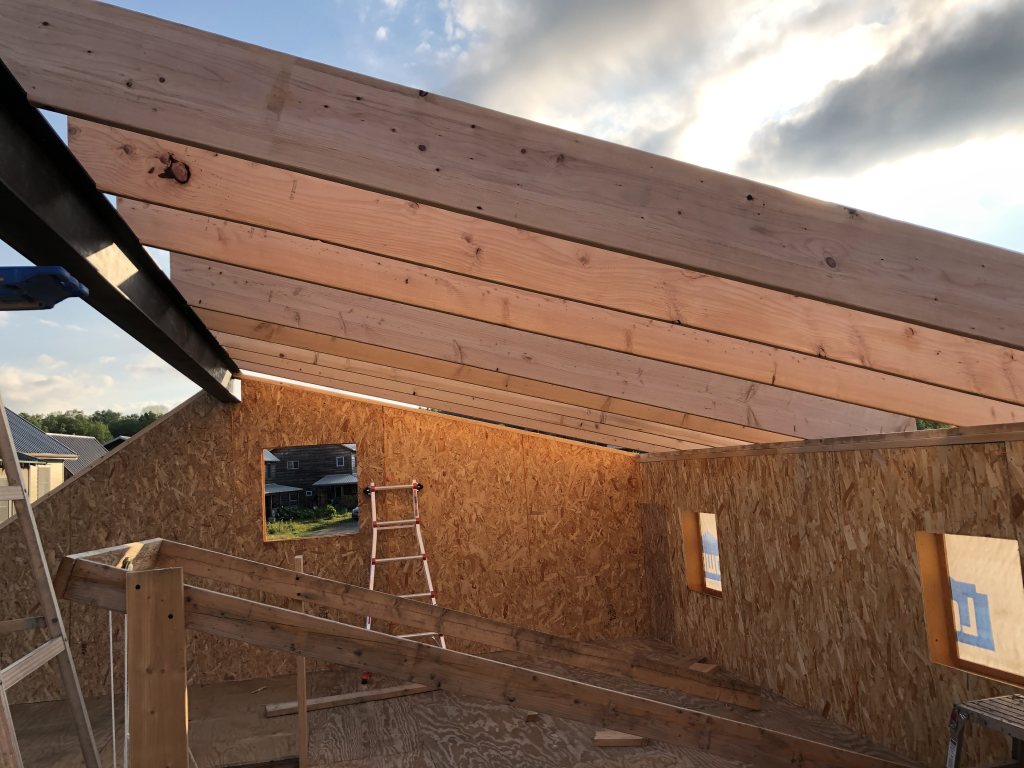
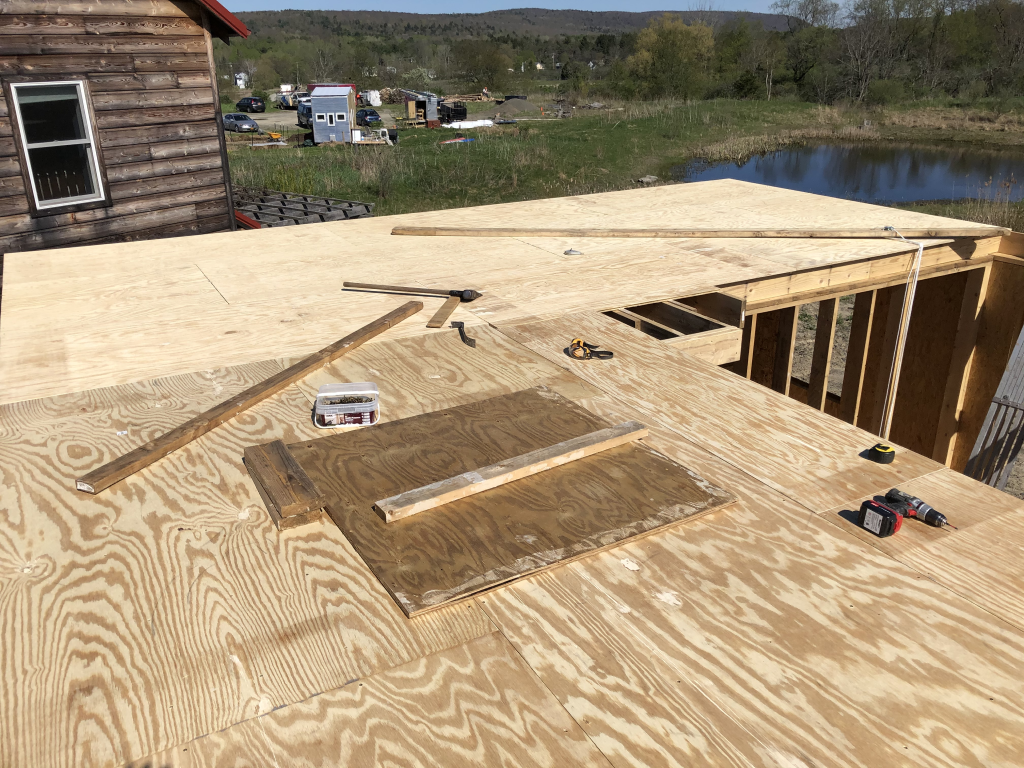
The safety equipment finally arrived on Aug 14, and by Aug 23 I had the south side fully decked.

2020-08-20 South Decking Underway
2020-08-23 South Decking Complete

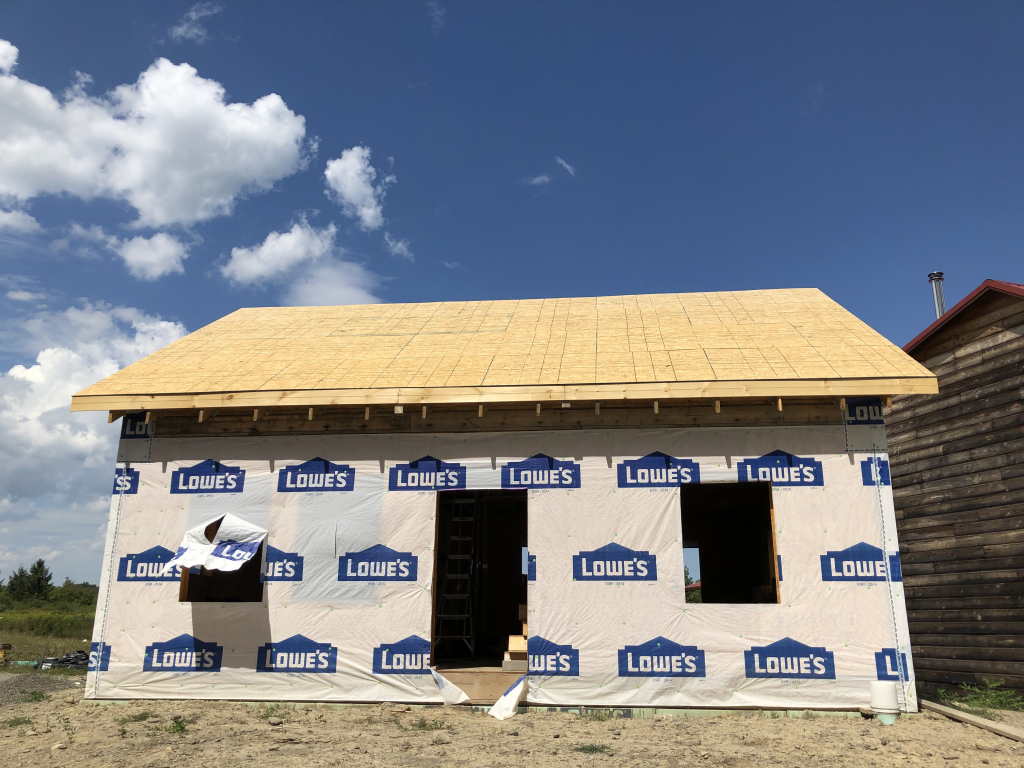
I then went back and finished the north side except for one panel which I left off so that I would have a way to access the roof for further work laying down underlayment or “roofing felt.”

2020-08-23 North Roof - Last Open Corner
2020-08-23 North Roof – Last Open Corner

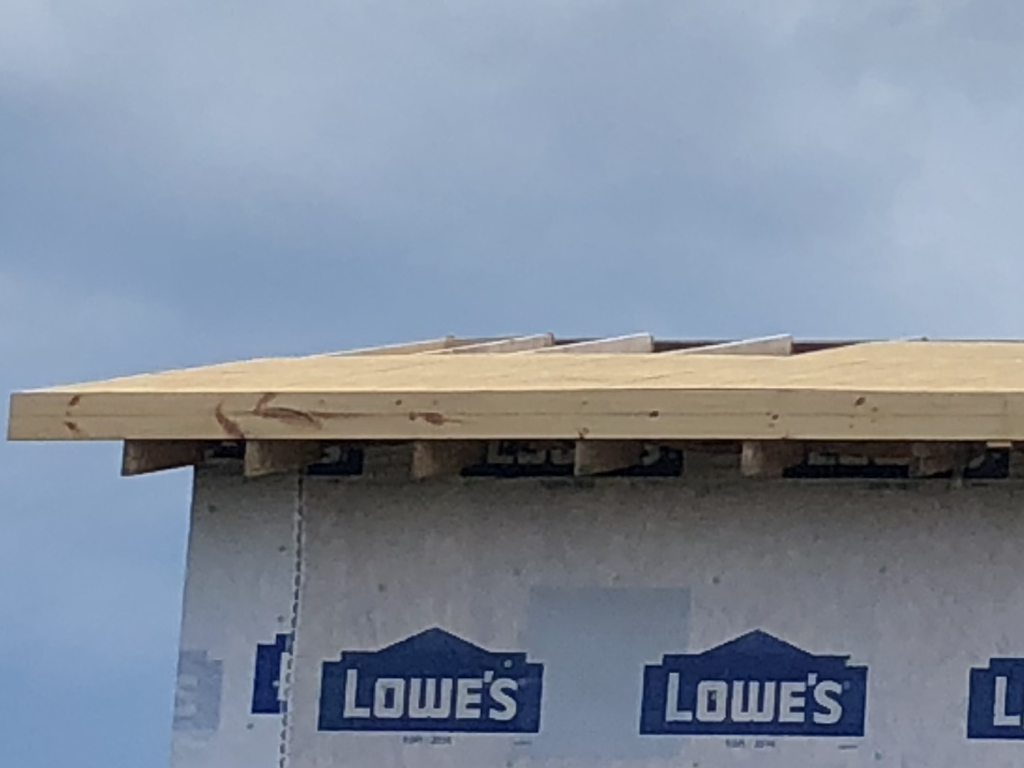
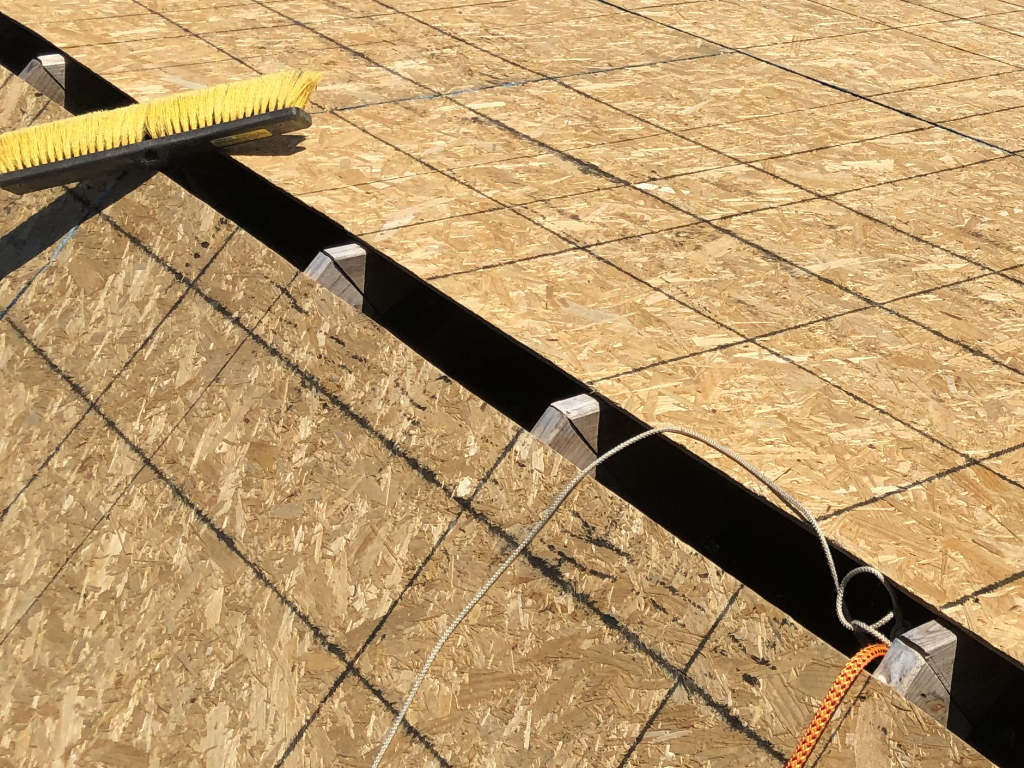
One thing that isn’t really visible in any of these contemporary photos is the roughtly 4″ gap at the top of the roof which remains to allow air to circulate under the decking.  I’ll elaborate more on that later, but here’s a cheater photo (taken in Sep.) to show the gap.  At the top left you can see a push broom for scale; at the bottom right you can see the top end of the mountain-climbing/safety rope which is tied to the I-beam below.

2020-09-20 Vent Gap at Roof Peak

Jul 2020: Up the Ladder to the Roof

When I was in college, The Nylons were very much in vogue.  I am sure it never occurred to me at the time that I might be climbing said ladder for the purpose of building said roof.

Cutting rafters is at lot of science and a small amount of art.  I learned the technique many years ago when I was drafted for the job during the construction of our community’s horse “run in” (think of it as half a barn).  It involves a lot of work making cuts known as “birdsmouths“; if you were to try to place a rafter without such a cut on top of the beam and top plate, what it would do is simply slide off (and hopefully not fall on anyone).  To avoid having the rafters naturally pulling away, they need to be resting on a horizontal surface.  The top of the beam and the wall plate are horizontal, and the birdsmouth cut—which looks like it’s at an angle when you’re staring at an uninstalled rafter—aligns with this horizontal surface when the rafter is installed.  This is where the old fashioned carpenter’s framing square really shines.  If you know the pitch of your roof—typically specified as a ratio in inches or feet, like my 3:12 shallow north side and 8:12 steep south side—you can simply find those number of inches on the two legs of the square and find it lined up exactly at the angle you want.

Making matters slightly more particular, the cuts can’t be more than a certain depth, but have to be a certain width, and various other parameters in order to meet code.  As mentioned last month, my oversized 2x12s really only needed to be 2x10s, and allow for a slightly deeper cut.

2020-07-03 North Side Rafters

The art comes in to figuring out which portions of the design you can simply repeat over and over for 13 rafters on each side, and which ones need to be carefully measured.  Art isn’t my strong suit.  I did a lot of measuring, averaging about 1h22m per rafter, for a total of almost 36 hours.  Pretty much every rafter went up once for measurement, down again for cutting, and back up again into place.  Also, until you get very familiar with it, you’ll probably find yourself turning the framing square around at least once and maybe twice for every single birdsmouth you try to mark.

Oh, and then there were those two outer rafters.  These turned out to be quite a chore, because the birdsmouths on the interior rafters caused them to fall slightly lower than the level where the cut SIP edge lay.  In the end I wound up having to do long rip cuts to adjust the rafters to match up with a level top surface.  Slightly more careful thought about the relation between the SIP cuts, inlet nailers, and beam position would have been helpful here.  Oh well, it worked.

2020-07-17 South Side Rafters

After putting the rafters in place, I started on what would become another of the many facepalm manoeuvres: placing blocking SIPs between the rafters.  It seemed like a good idea—in fact, it probably was a good idea—but for the fact that I didn’t think about the need for a gap for the roof ventilation (more on that later).  I got about this far before I realized the problem:

2020-07-24 Rafter Blocking SIPs

The second hand of facepalming was because that each one of those SIP blocks was a lot of work (about 22 hours).  Each one needed a carefully miter-cut 2×8 plus a lot of manually cutting foam out of the SIP; because of the angle, it wasn’t possible to use the SIP panel router.  That was a big part of the reason I decided to change strategy for the fix, rather than just cutting them down and trying again.  The replacement amounted to simply installing OSB panels, and then putting in foam board insulation with spray foam sealing after the fact.  However, the top end of these OSB panels had to be solidly anchored since they would be about 1-½” lower than the top of the rafters.  I settled on making a lot of small 2×3 blocks with angle cuts to slide around the OSB:

2020-07-28 OSB Angle Blocks

More than that.  A lot.  56 in total.

2020-08-01 Way More OSB Angle Blocks


How to make these efficiently is may actually be an interesting aside.  I cut the 2x3s down to a more manageable length (4′), and then set up a dado blade to make a cut of the right width to match the OSB (a little wider, so I wouldn’t have to deal with it binding).  But the dado blade had to be angled to match (or more accurately reverse) the angle of the rafters to meet the vertical OSB sheets.  Once again, the carpenter’s square (small version) comes to the rescue:

2020-08-01 Dado Blade Angle Setup

Just a word of caution: I had to take the blade guard off to swap the standard blade on the radial arm saw for the dado blade, and to set the angle.  Do what you need to be safe here.  Unplug the saw if you have to.  Put the blade guard back before you plug it back in.  Never stand in line with the blade when cutting.  You know the drill… er, the old saws… yeah.

So here’s what the old and new solutions look like side-by-side as I was pulling one out and replacing it with the other.

2020-07-28 Two Blocking Solutions


Jun 2020: Paper and Cranes

By early June, the SIPs were in place and I began to cover the house in “house wrap”.  This is a breathable material (often Tyvek) that is used to keep water from saturating the walls, while still allowing trapped water vapor to escape.  It’s part of a complex system for making the house weatherproof.  I wanted to get it up sooner rather than later to keep the sun and rain off the outer surface of the SIPs.

2020-06-14 House Wrap Going Up


Around the same time, with the second story gable end walls finished, I was able to hire a local crane company to move the roughly 600lb roof ridge beam into place.  Despite being quite an impressive process, I think I got a good deal: the crane service cost less than the beam itself!

2020-06-19 Roof Beam in Air
2020-06-19 Roof Beam in Air, South View
2020-06-19 Roof Beam in Place


Thus, by the end of the month, I began to cut rafters and install them.  These rafters are 2x12x16’s.  Although my load calculations showed 2x10s were entirely sufficient, the extra depth allows for the multiple layers of insulation that are needed to achieve R-50.

2020-06-28 Rafters Going Into Place

P.S. If it seems like I got a lot less done this month than last month, that’s probably true.  I started back at work full time at my lovely new local company GrammaTech, Inc.

Telling Another Story

I finished the first floor SIPs on May 5.  After that, I needed to put up joists to support the second story, and the second story flooring, where a little help from the family sped things up immensely.  By May 21, I was beginning to get the bottom inlet nailers for the SIPs in place.

Getting the SIPs up to the second story was another matter, because even though none of them were full 4×8 panels, they still weighed a lot more than a sheet of plywood.  So I built a weird temporary block-and-tackle rigid “crane” that let me hoist panels up to where I could slide them into place.

Temporary crane
May 25, 15:01: Temporary crane for 2nd floor SIPs

After this it was reasonably straightforward to cut and route the second floor SIPs, hoist them up, and put them into place.  One extra precaution involved temporarily attaching 16′ 2x4s onto the outside of the structure so that when the sip was raised, it couldn’t accidentally fall over the edge.

Use of boards to prevent SIP falling
May 31, 15:24: 2x4s placed to keep SIP from falling


The SIPs on the south end of the west wall, however, were more difficult since there was no floor in this area, which is intended to have a “cathedral ceiling.”  To make working on this side easier, on Jun 1 I built a “temporary” floor that was hung from the south wall and the triple joist supporting the kitchen ceiling.  Although it was made from smaller members (I had a lot of leftover long 2×4’s from the first attempt at the first floor) I added some extra support to make sure it was sturdy enough.

Temporary second floor
Jun 1, 17:59: Temporary second floor, bottom view

The top surface was made from leftover plywood from the original first floor as well.

Temporary second floor
Jun 1, 17:56: Temporary second floor, top view

This made it straightforward to lift, move, and place the remaining SIPs.  On Jun 5, with just one weekend to go before I started my new full-time day job, the SIPs were finished.

Finished SIPs
Jun 10, 18:58: Finished SIPs!

Snow Down and Speed Up

I was making good progress, I thought, and then… snow?  Yes, on May 9 we got our (hopefully?) last snowstorm of the season.

May 9 Snowstorm
May 9 Snowstorm

Right before this I had managed to get most of the interior structural walls built, and by May 12 I had started on the joists for the second floor.

May 12, 14:50: Second Floor Joists Begin

After some part delivery delays, I managed to get the rest of the needed materials by May 15 and pretty quickly got those up:

May 14, 14:27: Second Floor Joists

I was lucky enough to get some help from Raederle’s father Dale, who came to visit for a couple of days, and we were able to finish the second-story subfloor by May 20:

May 20, 16:19: 2nd Floor Subfloor

Now, I was ready to begin installing the second story SIPs!

Avoiding Header-Aches

As I started thinking about putting in the structural walls to support the floor joists, which need to go in before the second floor can be built, I started to agonize about certain aspects of the design that hadn’t really captured my attention before.

There are two areas on the original plans where very long (eight to ten feet long) “headers” (structural supports over openings) were needed to bridge over open areas: over the kitchen (shorter span, and less weight to bear) and above the two angled bedroom doors (longer span, and greater weight).  I wanted to keep these headers limited to 2×8 members, so that they wouldn’t have to drop down significantly into the living space, but there are limits to what even a triple 2×8 can span and still provide sufficient structural support.

Floor Plan Before Wall Adjustments

And then I found myself wondering why I had wanted those slanted doors in the first place.  I mean, they’re harder to build, they take away from the floor space in the bedrooms, they don’t actually add useful floor space to the living room… they just seemed like a bad idea all around.  Could I adjust the plan so that the doors were straight along the wall, thus providing a space between them where a vertical support (“jack stud”) could support the header?

One question led to another and pretty soon I was rethinking a lot of different things.  What did I really want to do for loft access?  Where would it go?  Was the area I had carved out for the washer/dryer actually the right size?  Were the closets the right size and optimally placed?  Did I need three doors within a few feet of each other around the bedroom and bathroom?  In the end I made a lot of relatively small adjustments, but several that I think are reasonably significant.

Raederle answered the question about the three doors with a resounding “yes”: given that the bedrooms open out onto the living area, it’s really important that at least one of the bedrooms offer a path to the bathroom without going into the common space.  Imagine your kids have guests over and you’ve slept in… do you really want to have to put clothes on to get to the bathroom in the morning?

We decided that the aesthetic of a spiral staircase would add a lot of appeal to the interior design.  This would take more floorspace (12-15 sq ft) than a drop-down attic stair (8-10 sq ft) but a whole lot less than a conventional staircase (33 sq ft), and despite the cost it would probably be worth the difference in making a more pleasant and usable space.  The placement of this couldn’t be after-the-fact, since it would have to come in to an area where the ceiling height was at least 7′ (a maximum of 18″ south and 48″ north of the centerline).  In the end, it pushed the doorway of the second bedroom to the south end of the wall.  (One can argue that this slightly improves egressibility since it opens out right onto where the back door is located.)

I tried adjusting the closets to go adjacent instead of back-to-back.  However, this created issues with the placement of the BR1-LR door and with ensuring the accessibility of the bathroom, and so instead I just stretched out the wall between them.  The combination of the door and closet placement now means that BR2 could more easily accommodate two twin beds, by poking one into the corner created by the closet.

A little fine-tuning on the loft design now brings the northern loft area further out over the kitchen, which gives better access to the west wall window in the loft.  (I may also take advantage of this to increase the kitchen cabinet sizes a bit on the right of the sink, though I haven’t addressed this in the design.)  There’s a small area between the staircase and the bathroom where the loft floor meets the staircase platform which is actually cantilevered out, but it’s under 2′ long and I don’t think it will be aesthetically objectionable since it’s at ceiling height.

I ensured that the washer/dryer space was big enough for the larger (4.3 cu ft) unit rather than the smaller (2.8 cu ft) unit that I had originally projected; this means it will fit a wider range of solutions.

I adjusted the west wall of BR2 to be a 6″ wall instead of a 4″ wall, to provide extra structural support for the flooring and make it easier to route mechanicals.  This wall is intended to come in partially overlapping the steel I-beam in the floor, so that it’s easy to route mechanicals to the side of the I-beam, while still being able to bear most of the weight directly on it.

Below is the resulting changed plan.  It probably doesn’t look much different unless you’ve been spending as much time thinking about this as I have… but it means that there are no headers on the west bedroom wall that exceed the width of a door, and the header over the kitchen falls into the range where three or four 2×8’s can easily provide the required support.

I needed to get this nailed down because one of the next steps is to actually lay out the placement of these walls on the subfloor, so that I can begin constructing the structural walls and then complete the rim joists and floor joists of the second floor.

Floor Plan After Wall Adjustments

Cuatro Muros el Cinco de Mayo (or, Getting 8 Feet High with a Little Help from My Friends)

I have previously mentioned that I got some help from my neighbor Dane in putting SIPs in place for the first corner.  Well he came back over for the final SIP of the first floor, which needed to be installed from the outside in.  Between the two of us we were able to hike the 25th SIP of the first story into place, and then I got it locked in and screwed and nailed down.

First Floor Complete
May 5, 16:20: First Floor (25 SIPs) Complete

I even managed to make it an early day and retire with a celebratory margarita and homemade salsa.  (I’ve been eating a lot of tomatoes, since this seems to make a big difference in how quickly I recover from sunburns.)  I was intrigued that Spanish distinguishes between structural walls (muros de carga) and non-structural walls (paredes).  I haven’t started on las paredes internas, although one of my next tasks is building some of the internal structural walls to support the floor joists.

We now have two days of rain and possibly a day of snow in the forecast, so I’m catching up on blogging, paperwork, constructing bookshelves, and various other things I can make progress on from indoors.  I’ve made some small adjustments to the floorplan as well, in consideration of where to place headers for second-floor joist support and some other factors.  I’ll update you on this in a separate post.

A few more interim progress photos:

South Wall Finished
May 2, 18:33: South Wall Finished
Kitchen Walls Finished
May 3, 18:43: West Wall of Kitchen Finished

Flying Nails and Falling SIPs

Yesterday was another great weather day and a day of good progress.  However, it also came with some unpleasant surprises – hopefully of the “that which does not break your leg, makes you stronger” variety.

First was the nail that I hit wrong, which instead of going into the wood, somehow bounced off the wood, the hammer, or whatever, and socked me right in the front incisor.  It certainly reinforced the reason that I’m wearing safety glasses even when I’m not cutting things.  It was a bit of a shock, but no long term harm done as far as I can tell.

By the early evening I had completed the north wall, which brought me up to 13½ SIPs, because the last section involved simply ripping a SIP up the middle to fill the remaining 22 inches.  The house also now has a front doorway, albeit lacking an actual door at this point.

Apr 28, 17:30: 13-1/2 SIPs

Thereafter, I began work on the first SIP of the west (kitchen) wall, and was struggling to get this done before nightfall.  As you can sort of see in the photo above, this SIP needed to come outside of the north wall to the west, but flush with the wall to the north.  That made putting it in place quite a bit trickier than anything else I’ve done to date.

Long story short, when I thought I had it nearly in place, I managed to drop it on myself – probably not all 137 pounds, because the other end was still resting on the floor, but it knocked me over and landed on my leg.  This hurt.  I was interested to discover that I did not (as far as I can recall) swear loudly or yelp in pain.  Those reactions seem more tied to things going wrong, like the sixth nail in a row flying off instead of going in, or to more precise blows (like the hammer blow to my middle finger, heh…)

In the end, I took a different (sliding, rather than tilting) approach to getting it into place, which was successful, and I was able to get my third corner done before nightfall.  (Just barely before, as you can probably tell from the lighting in the photo.)

Apr 28, 20:28: First West Wall SIP


East Wall Finished

Yesterday I finished the east wall, as well as getting in the bathroom window.  Four SIPs in total, including putting in the top inlet nailers.  Today it is snowing and raining and sometimes both, so progress has gone on pause again.

Completed east wall
Apr 25 15:10: Completed East Wall
Completed bathroom window
Apr 25 18:05: Completed Bathroom Window (North Wall)

A brief note on COVID-19.  Right now in NY state, single-person construction companies are allowed to operate on the premise that they can’t get anyone else sick.  So I fall under that.  However, when it gets to the point that I need help, e.g. bringing in a crane to lift the beam that supports the roof ridge, I will probably need to be past that.  As of today (Apr 26) Governor Cuomo has suggested that construction companies may be among the things to open when the stay-at-home orders are lifted (currently scheduled as May 15).  So, if I can have the SIPs completed by May 15, I should be able to schedule the roofing to begin shortly after that.  This gives me a narrow 3-week window to complete the main work of closing in the structure before Jun 8, when I’m scheduled to return to work full time.  So, that’s my timeline right now.


Time Keeps on SIPping

My original estimate was that I could do two SIPs per day, which would mean that I could complete the approximately 43.5 SIPs between their scheduled delivery on Apr 3 and May 6.  I thought it would be interesting to graph my progress toward the goal to see how the estimates compared to the reality.

Unfortunately as already mentioned, I was still working on redoing the floor until Apr 14.  That put me about 10 calendar days behind.  The first SIPs, however, started to go up faster than I had predicted. In late April and early May there were a number of weather-related delays.  Following this, there was a long pause up to May 24th where I was getting structural walls, joists, and flooring in place in order to have the platform to build the second story.  Between May 24 and Jun 5, the second story SIPs went into place.  I completed the SIPs just before I began my new job.

In the updated version of this chart, you can see that my rate estimate wasn’t too far off, but basically failed to account for the work building the platforms for both the first and second stories.

Final SIP Progress Chart through Jun 7
SIP Progress Chart through Jun 7 – All Done